Looking for a unique dog house build that not only gives your furry friend a cozy space but also matches the style of your home? We’ve got you covered! Our goal was to use up some dead space under the stairs and create a dog house that blended seamlessly with our New York Loft Style room. Here’s how we turned this idea into reality in just six simple steps!
The Overall Idea for the Dog House Build
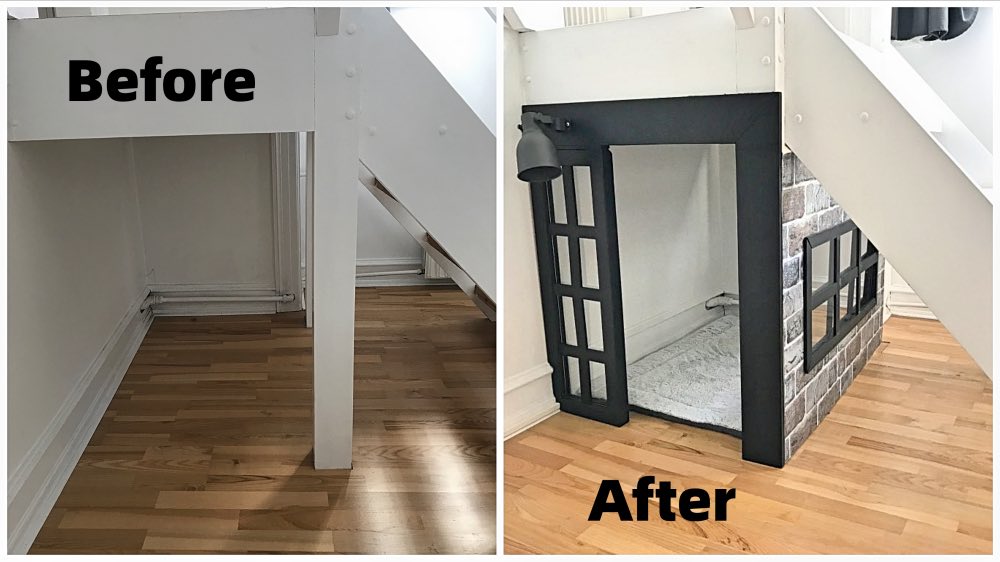
We had some unused space under the stairs that connected our couch area to the dining room, and we thought this would be the perfect spot for a dog house. Since our room already featured a New York Loft Style vibe with industrial glass walls, we wanted the dog house to match this aesthetic. By reusing some materials and putting in a bit of DIY effort, we managed to create a stylish dog house that perfectly fits the room’s design.
Total price
$0
Estimated time
15 Working hours
Difficulty
1.5/5
Step 1: Build the front window
Since we are huge fans of New York-style glass walls and already had them in the room, we decided to incorporate a similar design into the dog house build. The first step was to create a front window that mimics this industrial style.
To start, we built a simple wooden frame to house the window. We measured the opening where the window would go, then cut the wood to size and assembled the frame using screws. This not only gave the dog house a stylish look but also allowed us to add a unique design element to the front of the house.
Pro Tip: Make sure to sand down any rough edges on the wooden frame to ensure a smooth finish when it’s painted.
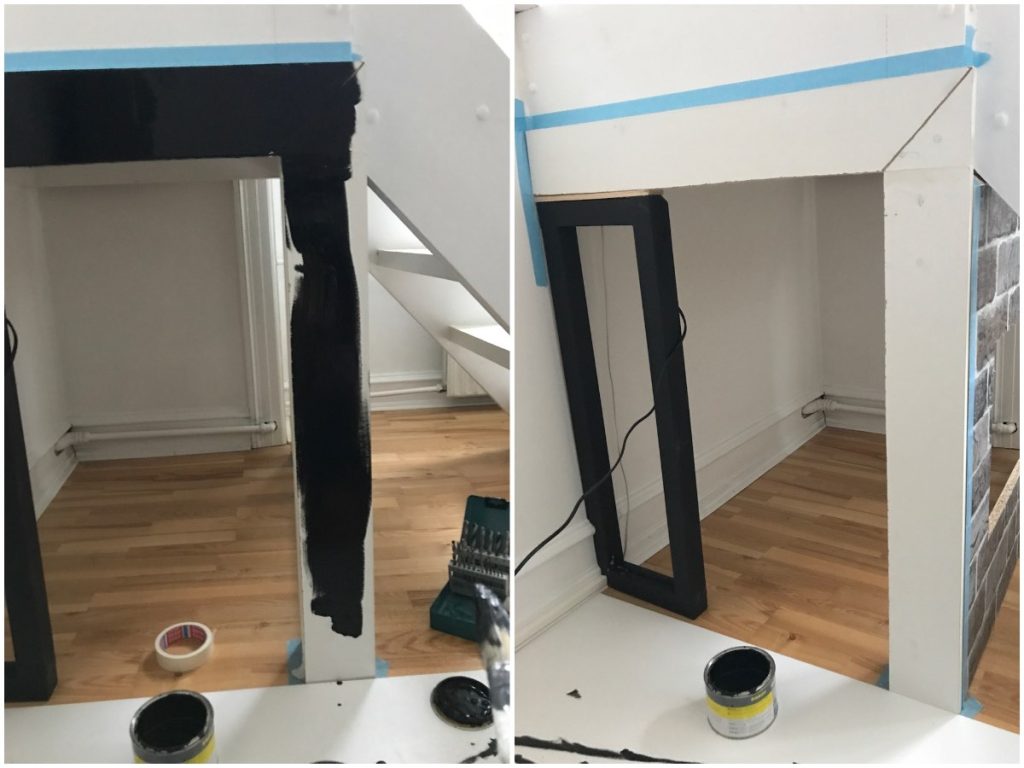
Next, we painted the wooden frame black to match the industrial look of the room. We used blackboard paint because it has a nice matte finish, which adds to the modern vibe of the dog house build.
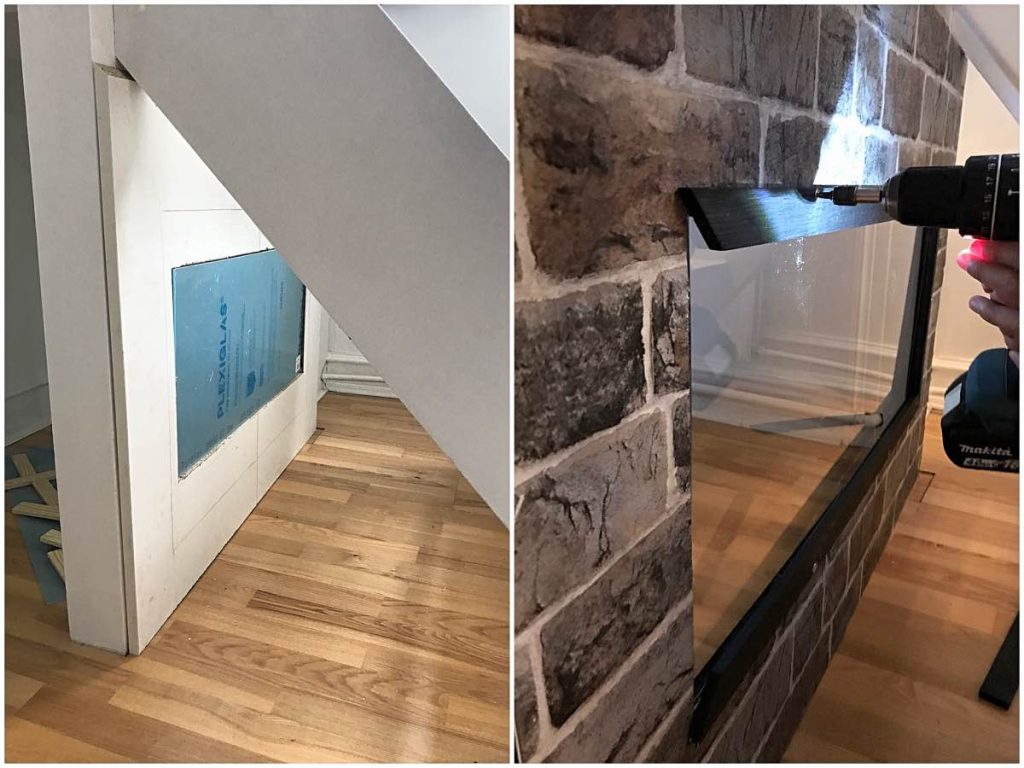
After painting, we cut out a piece of 3mm plexiglass to fit inside the frame. We found the plexiglass at a local store, and the multi-cutter tool made it easy to cut it to the right size. If you don’t already own a multi-cutter, this is a great investment for all kinds of DIY projects (Check out our article on the 11 Most Essential Handyman Tools for more on this must-have tool).
Pro Tip: Use painter’s tape on the plexiglass while cutting to prevent scratches and ensure a clean edge.
Step 3: Time to create a “brick wall” with a window inside
This part of the dog house build was both fun and challenging! We aimed to create a faux brick wall with a New York-style window inside. Here’s how we did it:
First, we cut out a plywood sheet to serve as the wall. Using the wooden frame we built in Step 1, we cut an opening in the plywood for the window. To give the wall that classic brick appearance, we applied a sheet of brick-patterned wallpaper over the plywood.
Once the wallpaper was in place, we installed the plexiglass window, securing it with the black-painted wooden frame. This little touch added an industrial flair to the dog house, perfectly tying it into the rest of the room’s decor.
Pro Tip: Apply the brick-patterned wallpaper carefully, using a squeegee to smooth out any air bubbles for a seamless finish.
Then we applied some brick-wall wallpaper, and finally we added plexiglass and a black-painted wooden frame.
Step 4: Add a door-frame
Now it was time to add a stylish entrance for our pup! We built a door frame around the opening of the dog house using small wooden boards. We then painted it black with the same blackboard paint to match the window frame.
The matte finish of the blackboard paint gives the dog house a chic, modern look, while also providing a durable surface that can handle a bit of wear and tear.
Pro Tip: Use painter’s tape along the edges of the frame to ensure clean, sharp lines when painting.
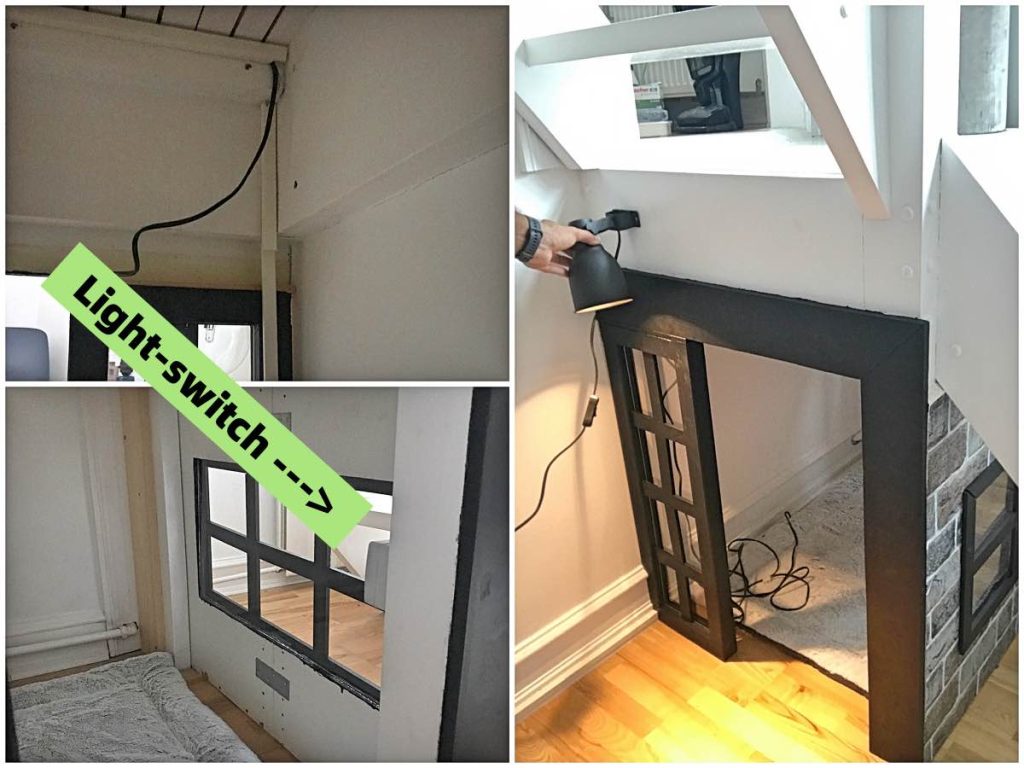
Nicolai came up with the brilliant idea of adding a light inside the dog house, making it feel even cozier. We installed a light fixture with a large switch inside the dog house, so it could be easily turned on and off.
For the dog’s safety, we made sure to hide all the wiring securely inside the walls where it would be out of reach. The final touch was adding a protective cover over the switch to keep it safe from any curious paws.
Pro Tip: Always use low-voltage lighting and make sure all wires are well-concealed to prevent any chewing accidents.
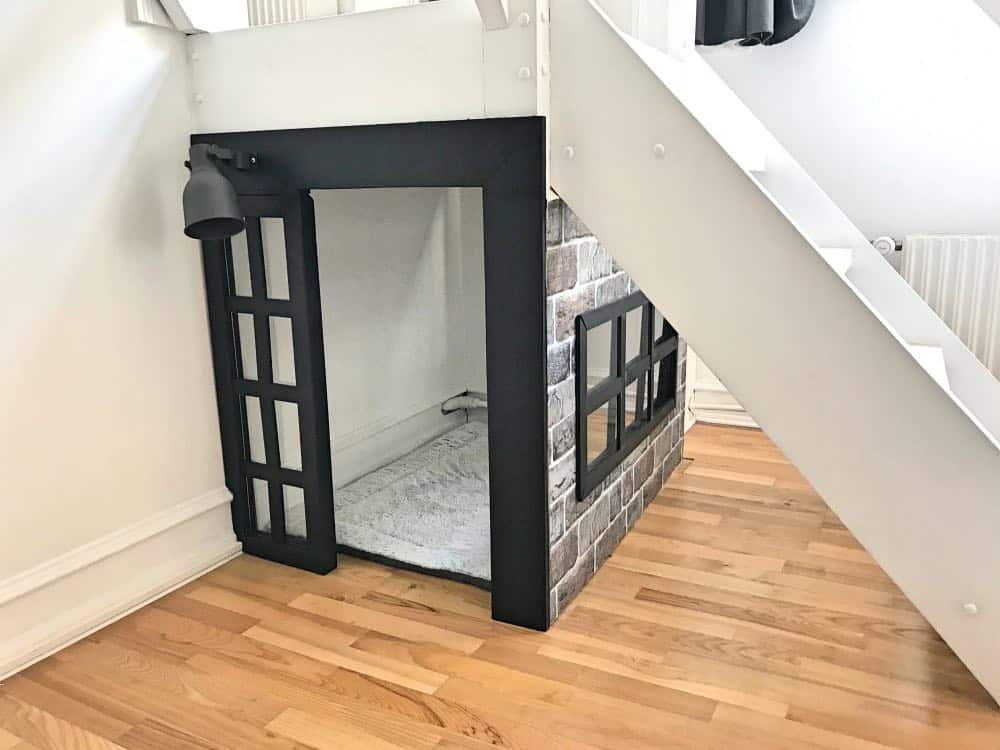
With the structural elements complete, the final step in our dog house build was to make it cozy and inviting. We added a soft dog bed inside, along with a couple of cozy blankets. The combination of the faux brick wall, glass window, and soft interior created the perfect space for our new furry family member.
And there you have it—our custom dog house build was done! The final product not only provided a cozy hideaway for our pup but also matched the New York loft style of our home, adding a stylish touch to an otherwise unused space.
Final Thoughts on Our Dog House Build
Creating a dog house build that fits both your pet’s needs and your home’s style is easier than you might think. With some creativity and the right materials, you can turn unused spaces into functional, eye-catching features. This project cost us about $200 and took 15 hours to complete, but the result was worth every minute and penny.
So, if you’re ready to build a unique and stylish dog house, follow these steps to create a space your dog will love and that seamlessly fits into your home’s design!