• hello@redesigndiy.com

Bar

home-bar-done

How to build a Home Bar on a budget

How to build a home bar on a budget

Have you always wanted to build a home bar, but always thought it was too difficult or expensive? Well, I can tell you that it is neither! I want to show you how to build a home bar on a budget, and you can do the same by following this step på step guide. 
Let’s jump in!
 
$ 0
Total price
Estimated time
30 Working hours
Difficulty
3.5/5

Before we started

So this was how it looked before we did anything. We had bought a wine-fridge and use put a left-over table top on top of it, and on the side we had put an high furniture from Ikea we also had as leftover. 
Home-bar-build-before

Step 1: Install Ikea kitchen drawer and wine-fridge

We bought a piece of Ikea kitchen furniture, the white one seen on the picture below. WE bought it with 3 drawers to store bottles in the bottom drawer, and cocktail-tools in the top drawers. 
We used some leftover wooden planks to build a little foundation for the wine fridge and kitchen drawer to stand on. 
We also decided to paint the wall behind the bar to make the area look like it own little part of the room. We used som leftover paint we had form when we did the bedroom (read article about the bedroom here) 
raw-build-process-home-bar

Step 2: Hang up the shelves

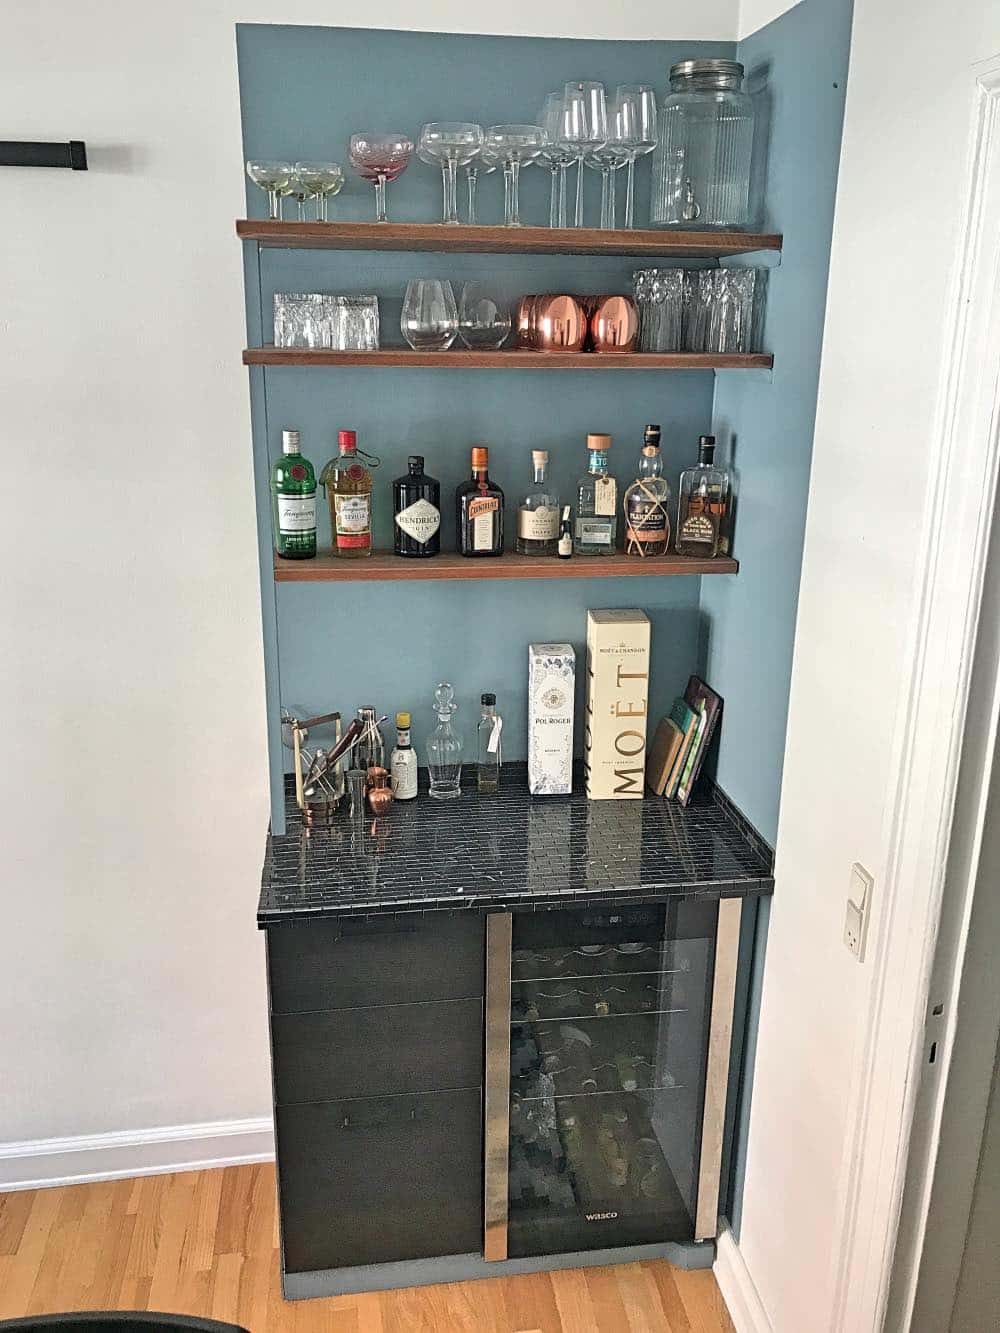
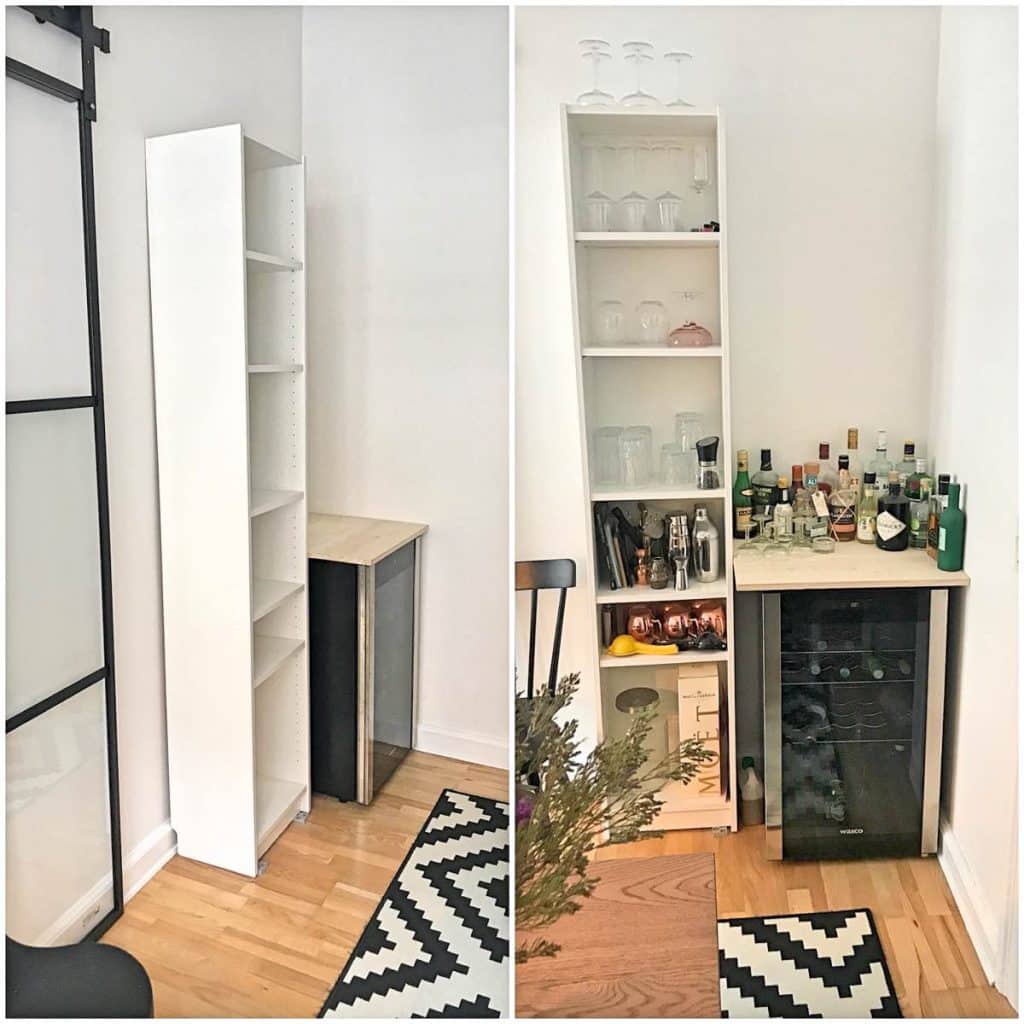
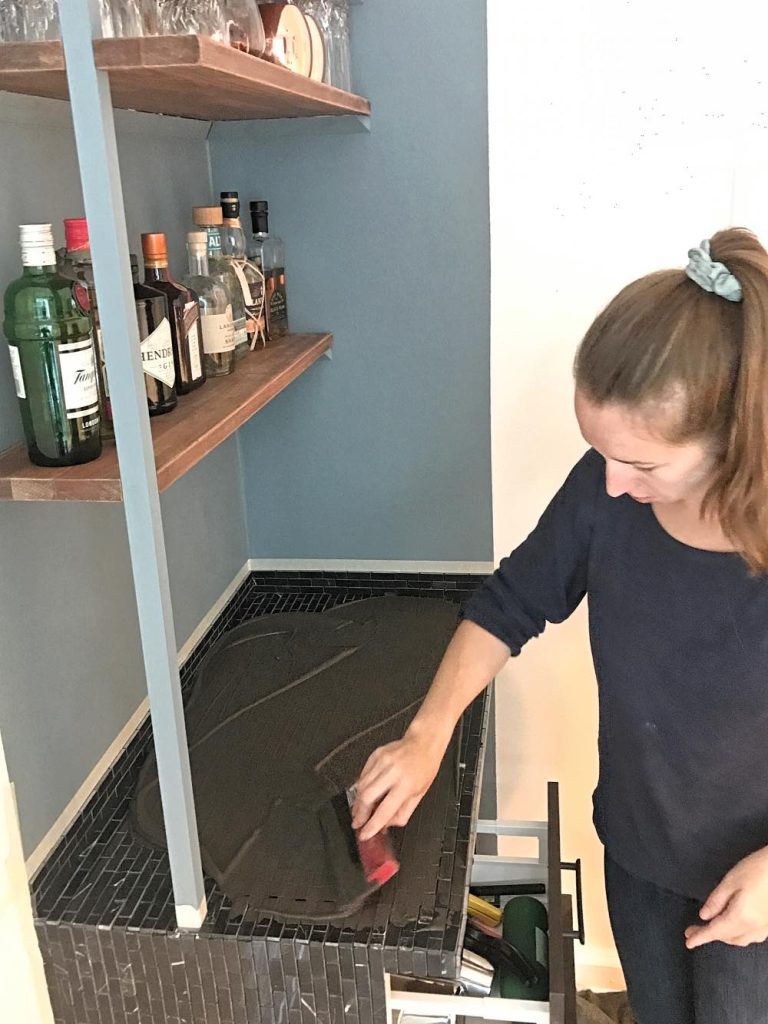
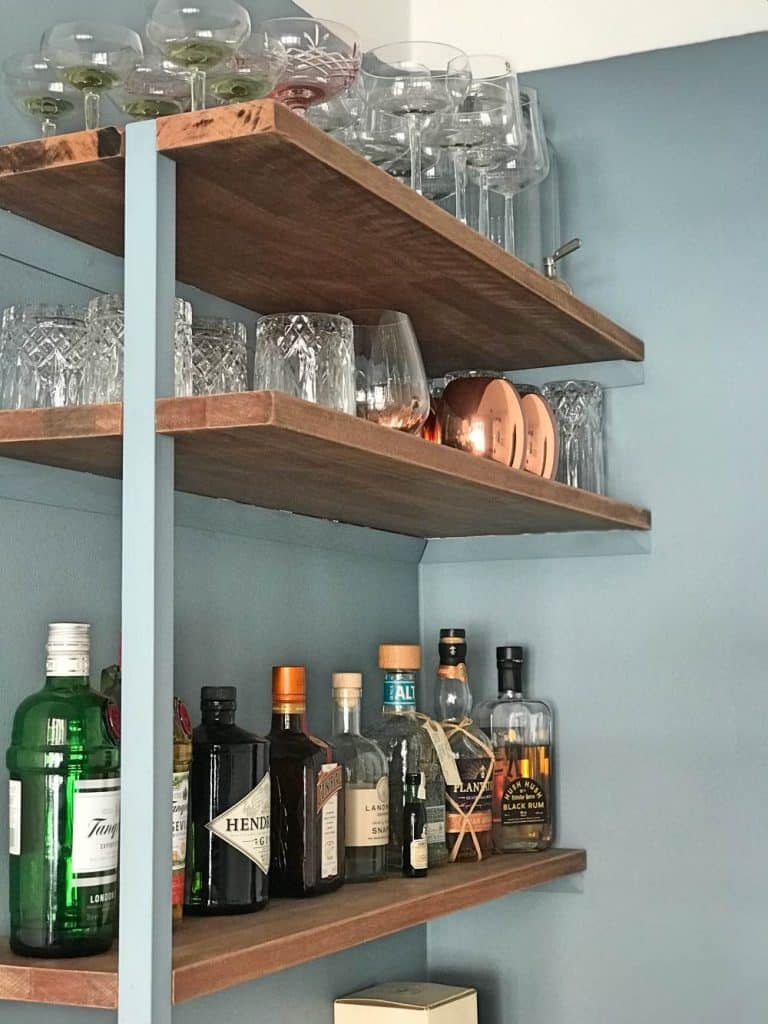
After the paint job and the wine-fridge and kitchen drawer was installed, then it was time to create some wooden shelves, to storer bottles and glasses. We were super lucky to find an old piece of dark wood in a container outside our apartment, and using a circular saw we cut 3 shelves in the right dimensions. 
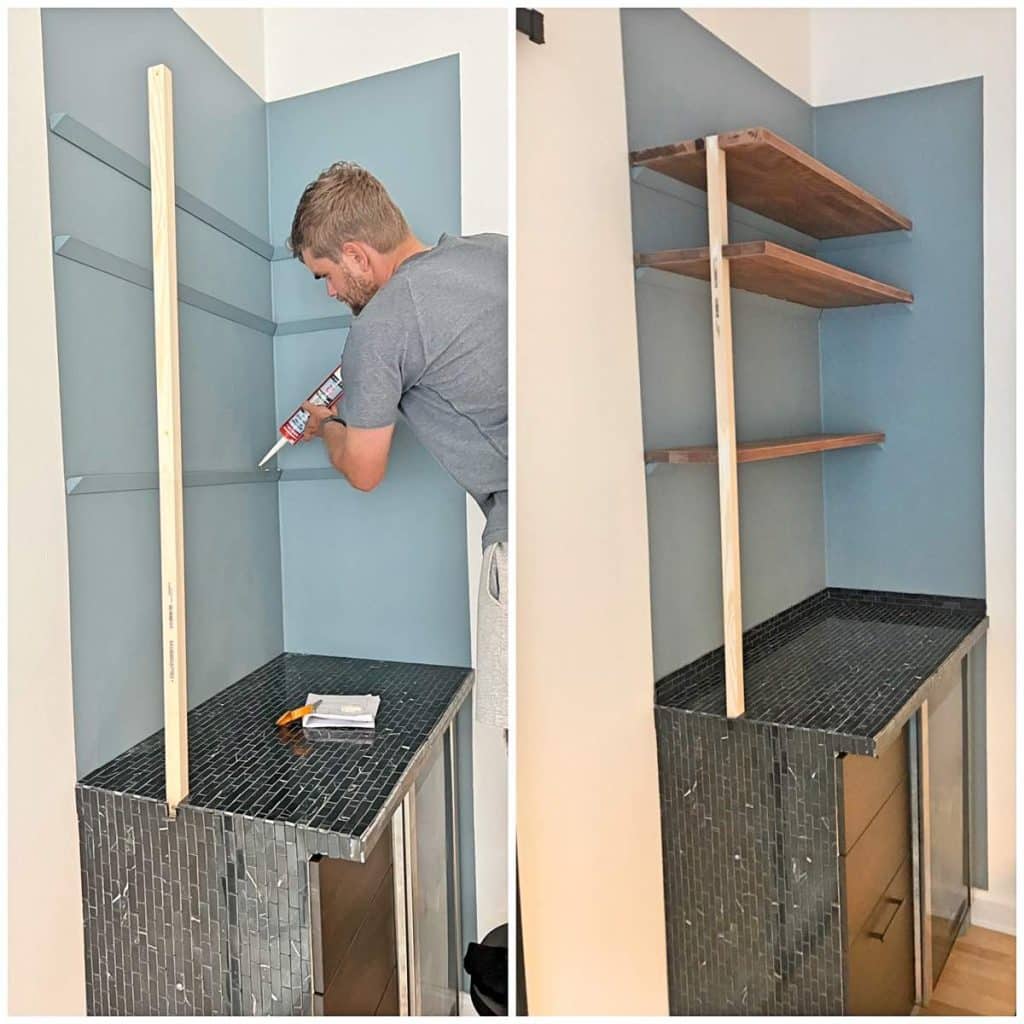
Using a triangle pieces of wood we crated a “frame” screwed into the wall, for us to put the shelves on. This was more of a decisions based on how we wanted it to look rather than finding the easiest way, since there was defiantly other easier ways to hang up the shelves. 
home-bar-shelves-build

Step 3: Mosaic time!

First we had planned to find a black marble table top to use in the bar. Put since we didn’t have the tools to cut one in the right dimensions, the price for a pre-cut marble paste was sooooo high! Therefor we decided on using mosaic! We found the most amazing system in Bauhaus, where you basically buy plates of mosaic, with super stick tape underneath! All we had to du was stick the mosaic plates in the table top, and make a few adjustments in the corners! 
Without the product form Bauhaus this would have taken us forever, but we managed to cover the whole bar within a few hours!
home-bar-mosaiq-done

Step 4: Final attachments and paint

After the mosaic project we painted the shelves-holders, and installed everything! Now we just need to add filler in-between the mosaic!
home-bar-almost-done

Step 5: Add filler between mosaic

Adding some dark-grey filler between the mosaic-tiles made the surface waterproof (quite important on a bar) 
Mosaic-filler

Final result

How to build a home bar on a budget​
home-bar-done-1
1