A New York loft style home office in the heart of Copenhagen? Not the most common find, but that didn’t stop us from bringing this dream to life! With some creativity, a bit of elbow grease, and plenty of inspiration, we transformed our loft area into a workspace with that iconic New York loft vibe. If you’re looking to create your own industrial-inspired office, follow along for all the details of how we did it!
Total price
$0
Estimated time
80 Working hours
Difficulty
4/5
The Area Before: A Blank Canvas
When we moved into the apartment, the loft area was essentially a blank canvas. The room has a ceiling height of over 4 meters, and the previous owners had built a loft to maximize the vertical space. Although the loft structure was useful, it lacked the character we were aiming for. Measuring around 2.2 meters from the wall to the handrail and 3.4 meters along its length, the area had plenty of potential for our New York loft style home office makeover.
The flooring was basic wood, which could have been great, but the type and color didn’t match the industrial loft vibe we were aiming for. We decided to start with the floor and work our way up to transform this space.
Step 1: Sandpaper the floor and add paint
The first step in creating our New York loft style home office was revamping the floor. Using a circular grinder, we sanded down the top layer of the wooden floor to smooth out imperfections and prepare it for a fresh coat of paint. Once the floor was ready, we applied three layers of white floor paint to achieve a clean, modern base that would complement the industrial elements we planned to add later.
Pro Tip: Using multiple coats of paint ensures a durable, long-lasting finish that can withstand the wear and tear of a busy home office.
With the floor looking fresh and modern, the next step was to build a statement office table. We had an older plank of wood stored from a previous home, and its rich color and grain pattern fit perfectly with the New York loft style home office theme we envisioned.
To give the table a unique, edgy look, we decided to extend the tabletop down to the floor, using it as a leg. We cut the plank with a circular saw at a 45-degree angle to create a seamless joint where the tabletop meets the floor. Small iron angles were used underneath for additional support.
To mount the table on the wall, we attached a square piece of wood to the wall, creating a sturdy base for the table to rest on. We then screwed the table into the wall-mounted support from underneath, achieving a clean, minimalist appearance.
Pro Tip: Using iron angles provides invisible support, maintaining the industrial aesthetic while ensuring the table remains stable and durable.
Tools: Circular Saw, Screwdriver, Level Materials: Iron Angles, Screws, Wall-Mounted Support
Step 3: Tame the Chaos with Storage Solutions
While we loved the initial table design, the space was quickly turning into a chaotic mess with office supplies scattered everywhere. To maintain the sleek, organized look of our New York loft style home office, we added a small drawer unit to store essentials like paper, pens, and cables. This simple addition made a big difference in keeping the space tidy and functional.
Pro Tip: Incorporate storage solutions that complement your design. For an industrial loft look, consider metal or dark wood drawers with minimalist lines.
Tools: Screwdriver (for assembly) Materials: Drawer Unit
Step 4: Add New York Loft Style to the home office
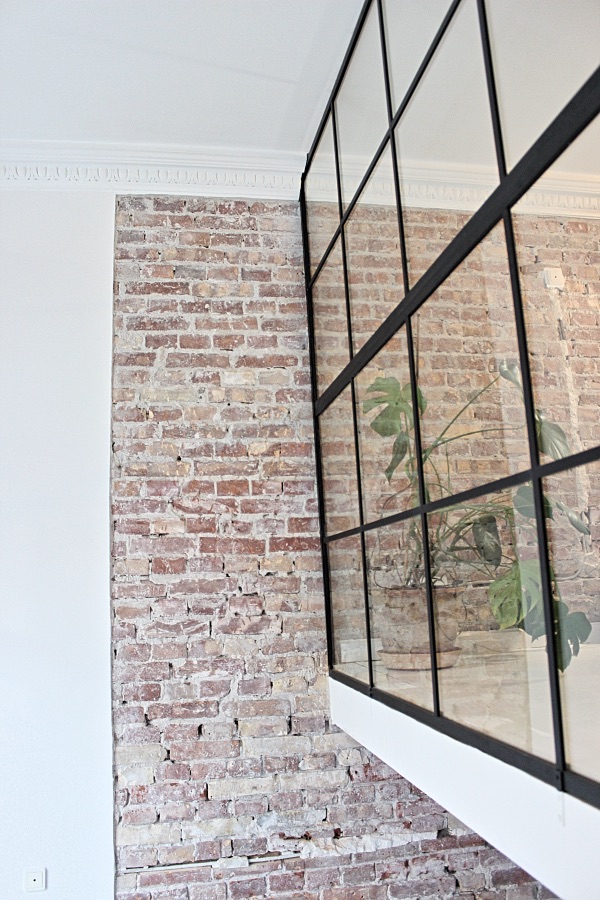
A true New York loft style home office isn’t complete without an exposed brick wall. We decided to strip away the outer layer of the wall to reveal the raw brick underneath. This step required some serious effort, but the results were well worth it!
We used a hammer drill with a flat head to remove the plaster and expose the beautiful brick. This method was much faster and more efficient than doing it manually. Once the brick was fully exposed, the room started to embody that classic loft aesthetic, instantly adding warmth and character to the space.
Pro Tip: If you want a cleaner, less dusty approach, consider using faux brick panels for a similar effect with less mess.
Well now we were getting closer to get the right vibe!
Step 5: Build a New York glass wall
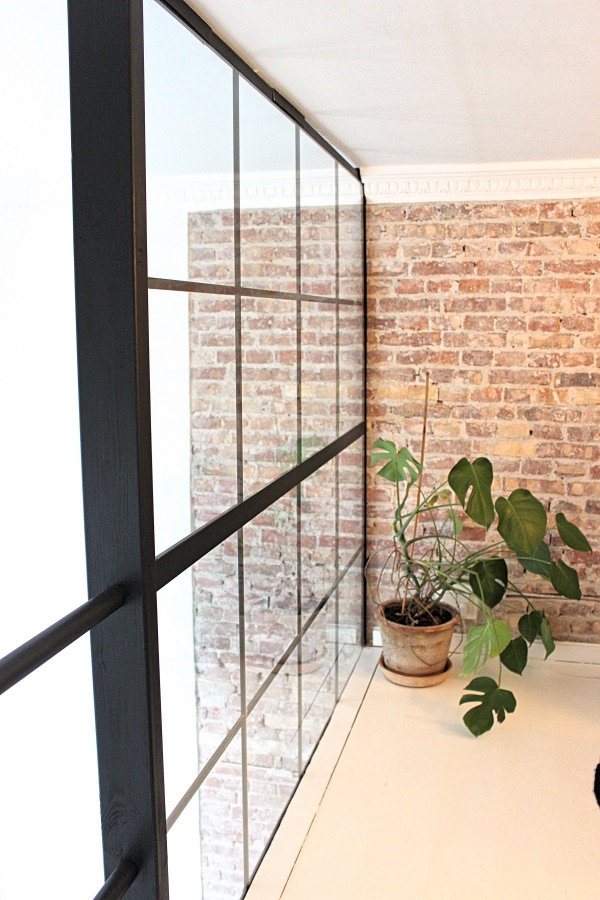
The next step was the most dramatic: replacing the existing handrail with an industrial glass wall. This addition was key to achieving the New York loft style home office look we were going for. We removed the old handrail and installed a DIY industrial glass wall, which you can read about in detail in our article: DIY Industrial Glass Wall.
The glass wall not only added an authentic industrial feel but also allowed light to flow freely between the loft and the rest of the room, making the space feel more open and airy.
Pro Tip: Industrial glass walls can be pricey, but using glass shower walls as a budget-friendly alternative gives you the same aesthetic at a fraction of the cost.
Finally, it was time to add those finishing touches that would bring our New York loft style home office vision to life. We went shopping and found a few key pieces: a sleek, modern chair, a stylish carpet, and a lovely drawer unit that fit perfectly under the table. These elements added the comfort and functionality needed for a productive workspace.
The final step was adding a few industrial-style decor pieces to complete the look, such as metal lamps, exposed bulbs, and minimalistic office accessories. With these last touches, our dream of a New York loft-style office became a reality!
Pro Tip: Choose furniture and decor that emphasize clean lines and neutral colors with a touch of rustic or industrial elements, like metal frames or reclaimed wood, to maintain the loft aesthetic.
Tools: None (for final decor) Materials: Chair, Carpet, Drawer Unit, Decor Items
Final Result: A New York Loft Style Home Office in Copenhagen
And there you have it! Our New York loft style home office turned out exactly as we had envisioned—a functional, stylish workspace that feels straight out of a Manhattan loft. The total cost came in at around $1,000, which is a small price to pay for such a dramatic transformation.
By following these steps, you too can create your own New York loft-inspired office, even if you’re miles away from the Big Apple. With the right design elements, a bit of DIY effort, and some creative thinking, you’ll be well on your way to achieving this iconic style in your own home.
Ready to start your New York loft-style makeover? Grab your tools and get building!
Have you ever dreamed of creating a stunning DIY industrial glass wall but were put off by the high cost and complicated process? What if I told you there’s an easy and affordable way to achieve that chic, New York loft-style look? In this guide, we’ll show you how to build your own industrial glass wall for just $450! Read on, and get ready to be amazed by how simple and budget-friendly this project can be.
Total price
$0
Estimated time
25 Working hours
Difficulty
3/5
Step 1: Order glass shower walls
The first step in building your DIY industrial glass wall is finding the right materials at an affordable price. We spent some time searching online for New York-style glass walls, but most of them were priced well over $1000 each—way out of our budget! Then, we stumbled upon a game-changer: glass shower walls.
We found beautiful glass shower walls for only $212 each. These shower doors have the industrial look we were after, with metal framing that mimics the style of traditional industrial glass walls. We ordered two of these to build our glass wall, keeping the total cost low without sacrificing style.
Pro Tip: Search for “New York Glass Shower Walls” to find budget-friendly options that suit your project.
Materials: 2 Glass Shower Walls Cost: $424 (for two walls)
Step 2: Clear area
Now that you have your materials, it’s time to clear the area where your DIY industrial glass wall will go. We started by removing the handrail in the loft area using a handsaw. Make sure to clear out any unnecessary items and prepare the space for the installation.
While working on the glass wall, we also took the opportunity to repair a nearby brick wall. If you’re interested in adding more industrial elements to your space, check out our guide on building a DIY Brick Wall.
Tools: Handsaw, Screwdriver Materials: Drop Cloths, Tarp for Dust Protection
Step 3: Prepare the Installation Area
After clearing the space, it’s time to prepare for the installation of your DIY industrial glass wall. In our case, the loft area where the wall would be installed was only 178 cm high, while the glass walls were 220 cm high and 90 cm wide. To make them fit, we had to cut away 2 cm from the floor.
Using a multi-cutter tool, we carefully cut the edge of the floor to create the space needed for the glass wall. This step requires precision, so take your time to measure and cut accurately.
Pro Tip: If you don’t already own a multi-cutter tool, consider investing in one. It’s a versatile tool that can handle a range of tasks, making it invaluable for this project.
I used my Multi Cutter tool for this job, cutting from both sides of the edge of the floor. Check out the 11 Most Essential Handyman Tools to read more about the Multi Cutter Tool, it is AMAZING!
Step 4: Prepare the Ceiling
The next part of the preparation process involved modifying the ceiling. We had a nice rounded corner with a pattern that needed to be trimmed to fit the glass wall snugly. Once again, the multi-cutter tool came to the rescue, allowing us to make the necessary adjustments quickly and cleanly.
Pro Tip: Use painter’s tape to outline the area you need to cut on the ceiling to ensure a straight and precise cut.
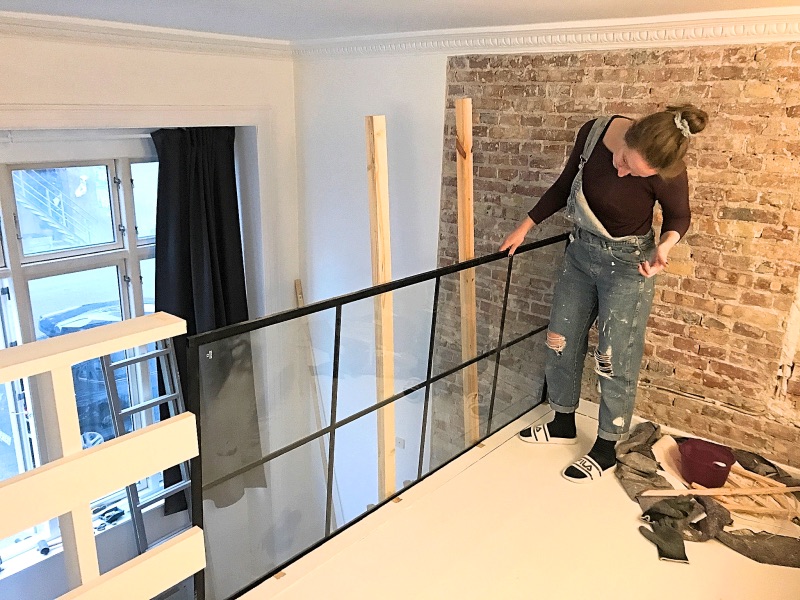
With the floor and ceiling modifications complete, it’s time to test the fit of the glass walls. Carefully position the walls in place to ensure they fit properly within the space. We put up two temporary poles on the outside to test how the glass walls would align and function.
Pro Tip: Testing the fit before permanently installing the walls helps you identify and address any issues early, saving time and hassle later on.
Tools: Measuring Tape, Temporary Support Poles Materials: Drop Cloths
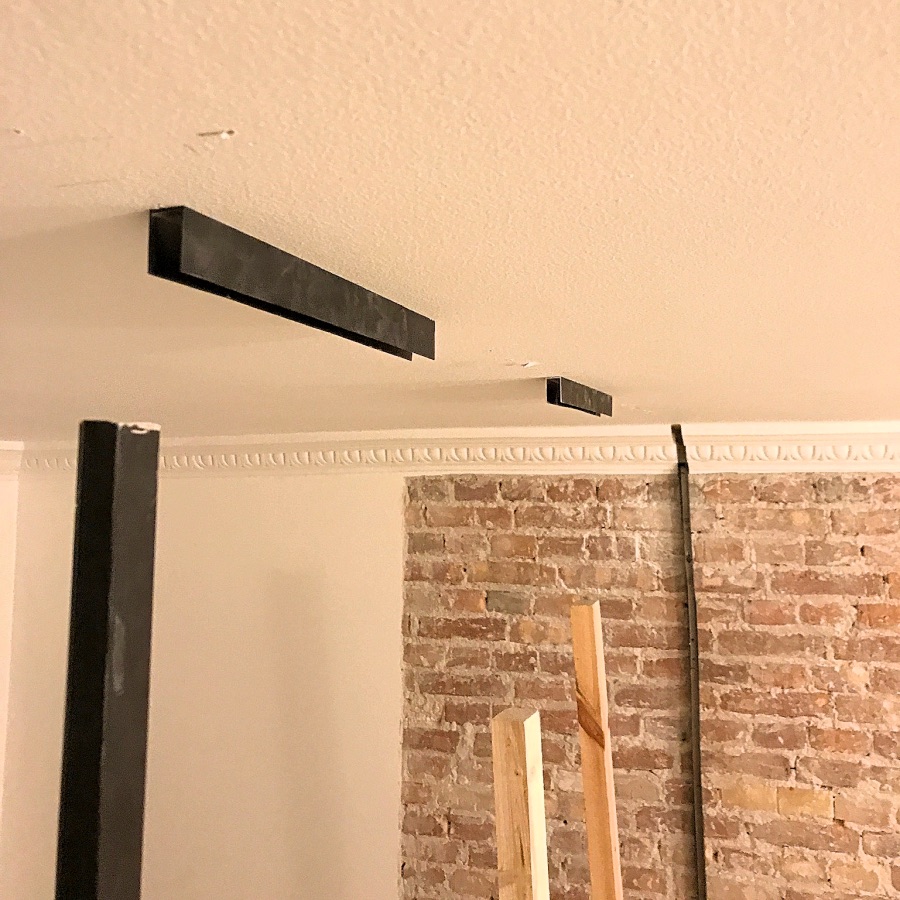
Step 6: Building a frame to hold the walls
Since we planned to stack the two glass shower doors on top of each other, we needed a sturdy frame to support them. Luckily, the shower doors came with attachment rails. We cut these rails into several pieces and drilled holes through them to attach them to the ceiling and brick wall securely.
Precision is key when building the frame. Use a digital level and ruler to ensure that everything is perfectly aligned. This step will determine the stability and final look of your DIY industrial glass wall.
Pro Tip: Double-check all measurements before cutting the rails and drilling holes. A small mistake at this stage can affect the overall fit and stability of your glass wall.
Tools: Saw, Drill, Digital Level, Ruler
Materials: Attachment Rails, Screws
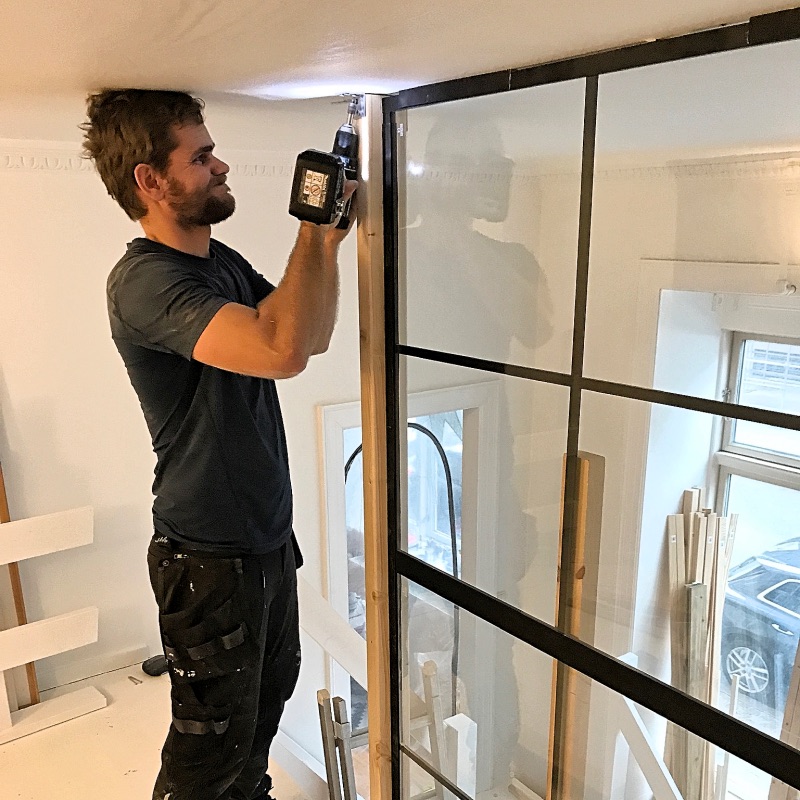
Step 7: Installing the walls
Here comes the moment of truth—installing the glass walls! We carefully stacked the two shower doors on top of each other and sealed them within the frame we built. To secure the structure, we connected a solid pole between the ceiling and the floor. This pole acts as a support, holding the glass walls firmly in place.
Pro Tip: Get a helping hand for this step, as handling large glass panels can be tricky. Safety comes first, so use gloves and take your time during installation.
With the glass walls securely in place, it’s time to add the finishing touches to your DIY industrial glass wall. We used some leftover wooden sticks to create a simple handrail and added filler to cover any small gaps or cracks in the installation. After smoothing everything with sandpaper, the wall was almost complete!
Pro Tip: Using a high-quality filler ensures a smooth finish, making the entire structure look polished and professional.
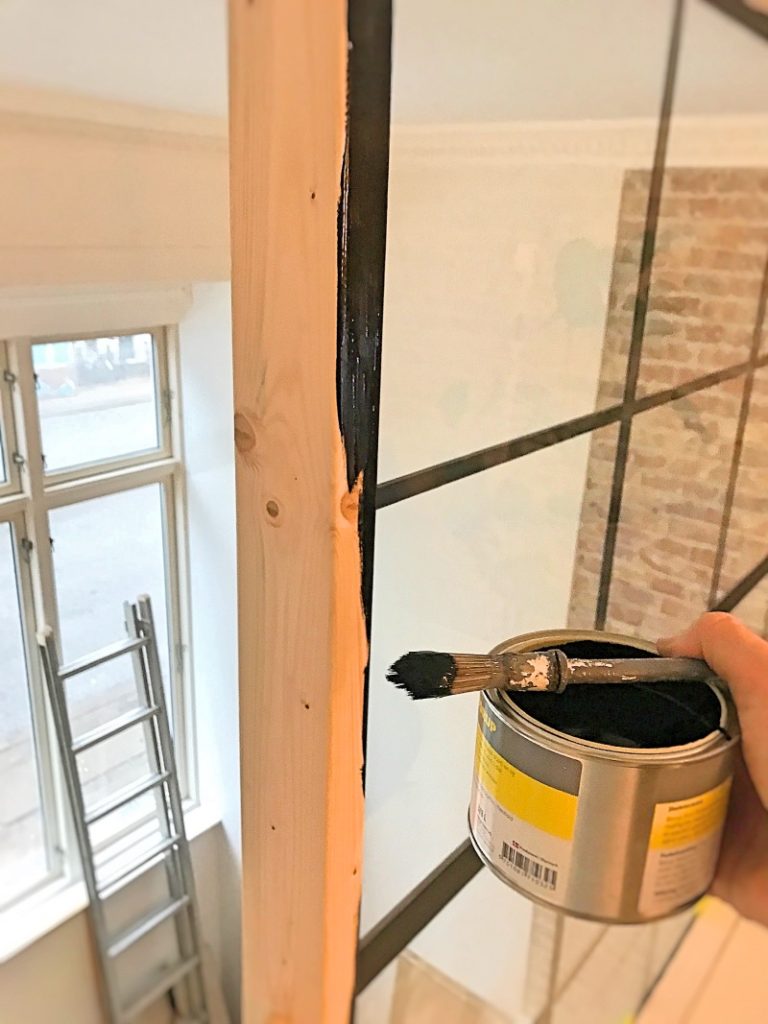
For the final step, we painted the wood around the glass wall using blackboard paint. This particular paint has a beautiful matte black finish that perfectly complements the industrial style. A couple of coats were all it took to achieve a sleek, modern look.
Pro Tip: Use a small paintbrush to reach tight corners and ensure an even coat for a flawless finish.
Tools: Paintbrush, Drop Cloths Materials: Blackboard Paint, Painter’s Tape
Final result
And there you have it! A stunning DIY industrial glass wall that adds character and a touch of modern industrial design to any space. The total cost of $450 is a fraction of what you’d pay for a pre-made industrial glass wall, and the sense of accomplishment from building it yourself is priceless!
Final Thoughts on DIY Industrial Glass Wall
Building a DIY industrial glass wall is an exciting project that can dramatically transform your living space. By using glass shower walls and a bit of creativity, you can achieve a high-end, loft-style look without breaking the bank. The key to success lies in careful planning, precise measurements, and taking your time with the installation.
So, are you ready to add an industrial edge to your home? Follow these steps, and you’ll have a stunning glass wall that’s sure to impress!