Are you ready to see how we completed a stunning DIY hallway makeover for less than $300? Hallways are often overlooked, yet they’re the first impression guests get when they step into your home. With some creativity, the right tools, and a bit of elbow grease, you can completely transform your hallway into a functional and stylish space.
Follow along to see how we gave our hallway a fresh, new look!
Total price
$0
Estimated time
40 Working hours
Difficulty
1/5
The Hallway Before: A Blank Canvas
When we first moved in, the hallway felt cramped and dark. The previous owners had left a large closet in the middle of the space to provide storage and conceal the electricity control board. However, the bulky closet made the hallway feel much smaller than it actually was. That’s when we decided it was time for a DIY hallway makeover to open up the space and create a more welcoming entryway.
Step 1: Choose color
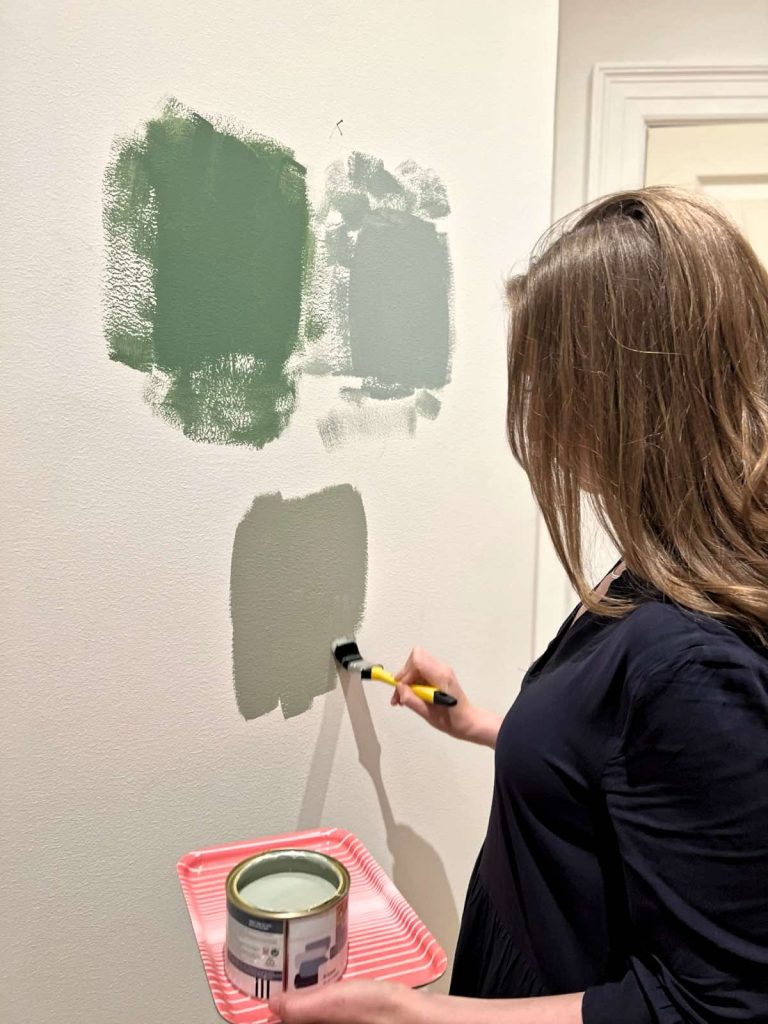
The first step in our DIY hallway makeover was selecting the perfect paint color. We knew we wanted to paint the entire hallway to refresh the look, but finding the right shade was trickier than expected. After testing four different samples, we finally settled on a beautiful green-grey olive color from our go-to store, Bauhaus. The warm, earthy tones of this color would bring a modern yet cozy vibe to the hallway.
Pro Tip: Take your time when choosing a paint color. Test different shades directly on the walls to see how they look in various lighting throughout the day.
With the color chosen, the next step in our DIY hallway makeover was to remove the old closet. It took some wrestling, but we eventually freed the bulky piece from its spot in the middle of the hallway. Instantly, the space felt more open and inviting! Removing the closet also revealed some damaged areas on the walls, which we filled and covered with a basic coat of white paint.
Pro Tip: Make sure you have the right tools on hand for this phase. If you’re not sure where to start, check out our list of the 11 Most Essential Handyman Tools to build your tool collection.
Tools: Hammer, Crowbar, Putty Knife
Materials: Filler, Sandpaper, Primer
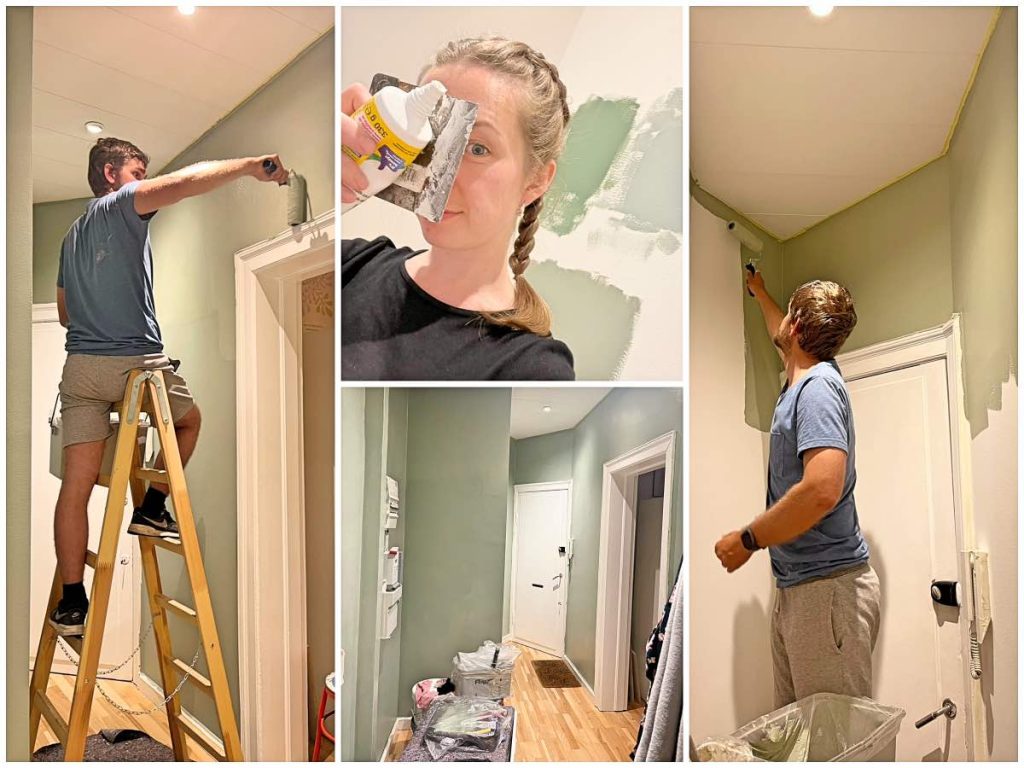
Step 3: Paint
Once the hallway was cleared, it was time to paint! We applied two layers of our chosen olive-green paint, and the transformation was immediate. The new color gave the hallway a fresh, modern feel and completely changed the room’s character. This step was crucial in setting the tone for the rest of the DIY hallway makeover.
Pro Tip: Always start with a coat of primer if your walls are a darker shade or have stains. This will help the new color go on more smoothly and evenly.
Tools: Paintbrush, Roller, Paint Tray Materials: Wall Paint, Primer
Step 4: Build furniture
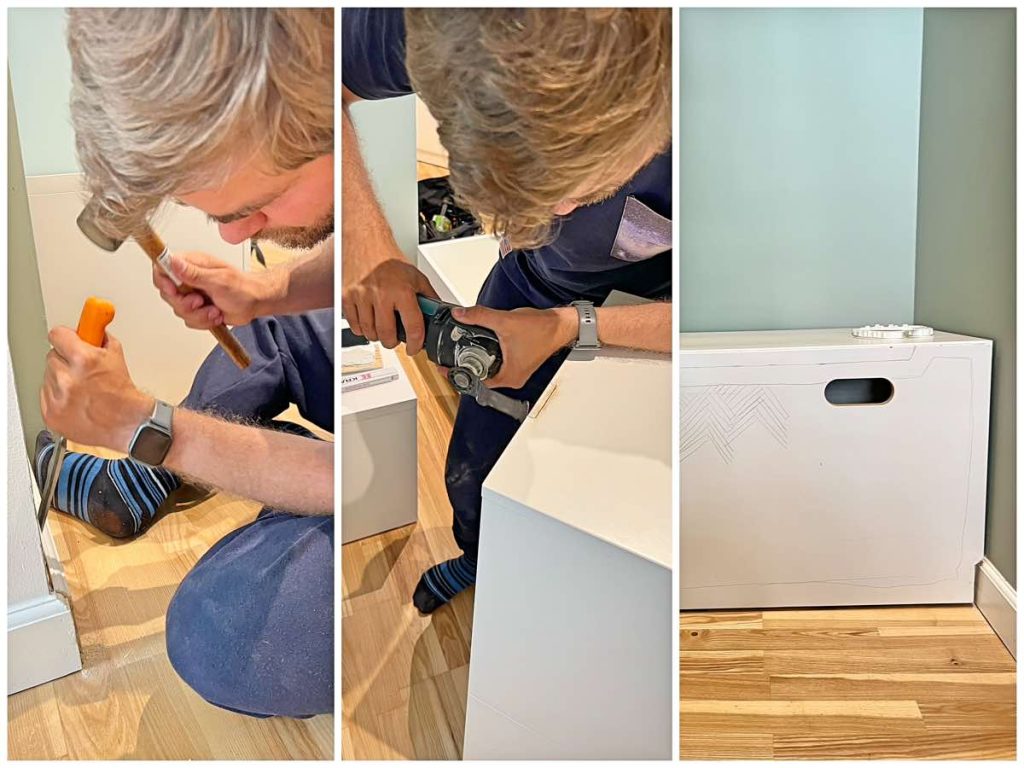
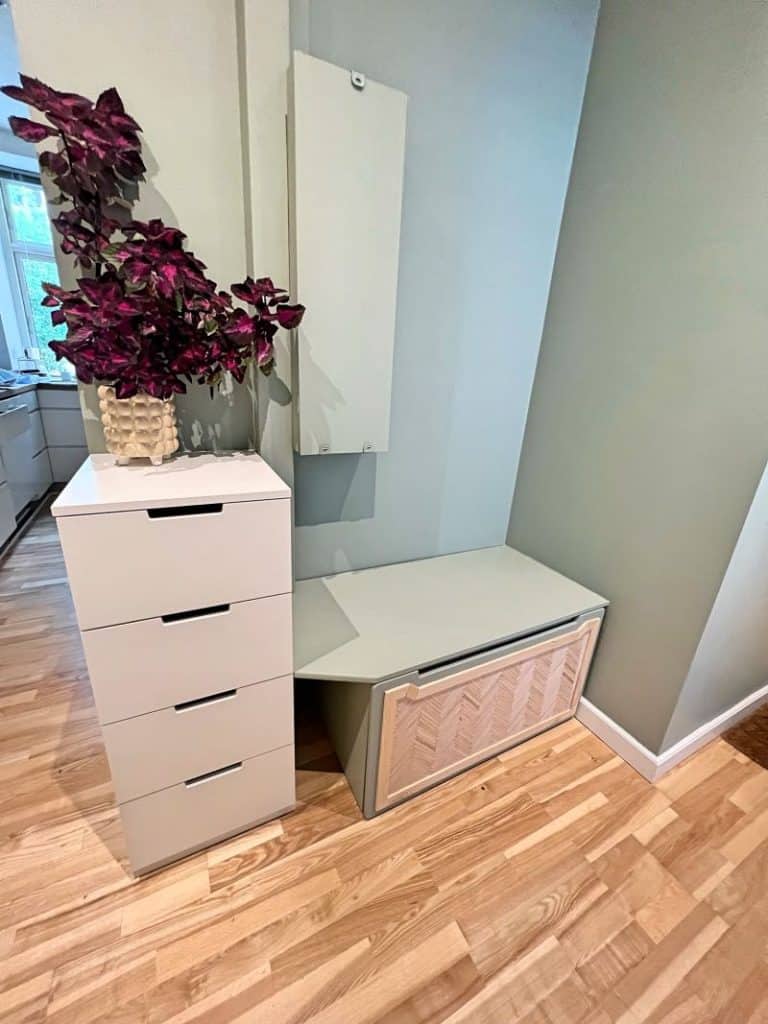
After removing the old closet, we needed new storage solutions that wouldn’t overwhelm the space. We spent hours researching and finally found two pieces of furniture from IKEA that were perfect for our DIY hallway makeover—a shoe drawer for everyday items and a combined bench/drawer. We bought them second-hand at a bargain price, keeping our budget in check.
The bench provided a functional spot for putting on and taking off shoes, while the large drawer underneath offered a place to store work bags that used to clutter the hallway. To cover up the electricity control board, we built a simple frame using leftover wood.
Pro Tip: Opt for second-hand furniture to keep costs low, and don’t be afraid to make minor modifications to fit your space.
To make the new furniture fit seamlessly into our hallway, we had to make some adjustments. We trimmed the bench/drawer and the shoe drawer to align perfectly with the hallway’s dimensions. A few small cuts in the furniture and adjustments to the floor molding did the trick, creating a more custom-built appearance.
Pro Tip: Always measure twice before cutting! A precise fit makes all the difference in achieving a polished look in your DIY hallway makeover.
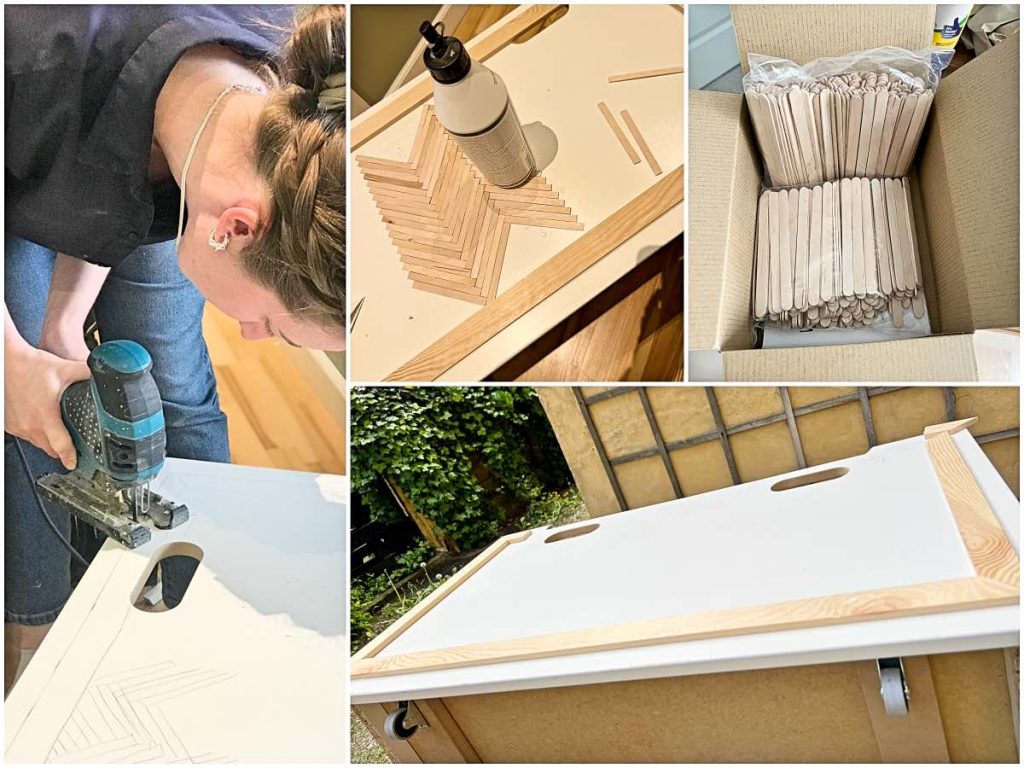
Annie came up with a brilliant idea to add some personality to the large drawer under the bench. She purchased 400 wooden ice sticks and arranged them in a herringbone pattern on the drawer front. To tie the look together, she painted sections of the sticks in the same green color as the hallway walls. This little DIY touch not only matched the room’s color scheme but also created a stunning focal point that looks far more expensive than it actually was!
Pro Tip: Adding small DIY elements like this can elevate the design and make your space feel unique. It might take some extra time, but the results are worth it!
Tools: Hot Glue Gun, Paintbrush
Materials: Wooden Ice Sticks, Leftover Paint
It did take quite some time, but the final result was all worth it!
Final Result: A Stunning DIY Hallway Makeover
The last step in our DIY hallway makeover was to paint the rest of the bench in the same green color and install hooks for jackets and small bags. These simple additions completed the space, creating a functional and inviting entryway that feels organized and stylish.
And here is the final result! Our hallway now has a fresh, modern vibe that fits the aesthetic of the rest of our home. By carefully planning each step and adding personalized touches, we achieved a complete transformation for just $280.
Final Thoughts: DIY Hallway Makeover on a Budget
A DIY hallway makeover doesn’t have to be expensive or complicated. With a bit of planning, creativity, and some DIY magic, you can turn a cramped, cluttered hallway into a welcoming and stylish space. The key is to focus on what will make the biggest impact—whether it’s choosing the right paint color, selecting functional furniture, or adding unique DIY elements like our herringbone drawer front.
So, ready to tackle your own hallway makeover? Use these steps as your guide, and create an entryway that makes you smile every time you walk through the door!