• hello@redesigndiy.com

Author Archives: redesigndiy.com

5 Phases of every DIY project

5 Phases of every DIY project

5 Phases of every DIY project

Always go through these 5 phases for your next DIY project! Skipping one can sound tempting to save time, but it is usually never af good idea!

1.Inspiration research

First phase is the research phase. Use Pintrest, Instagram, Facebook, websites and  go to stores to come up with great ideas and see how other people have designed their projects.

2. Actual planing

When the overall idea is finalized, start the actual planning. Start measuring and drawing your design, either in a drawing program, free hand og using a 3D software. Also make sure to go through what materials you need, and where the building proces stats and ends.

3. Go shopping

Now it’s time to go get all the stuff you need. From furniture, paint, tools and everything else you need for your project. The better planning you have done, the easier it’s gonna be.

4. Raw building

Now the actual building process starts. First all the bigger raw building should be done. Make sure you have thought the process through, and do the right things at the right time.

5. Fixing details

Now it’s time to fix all the smaller details. Apply paint, fix small mistakes in the raw build, and make everything look smooth and nice!
5 Phases of every DIY project
home-bar-done

How to build a Home Bar on a budget

How to build a home bar on a budget

Have you always wanted to build a home bar, but always thought it was too difficult or expensive? Well, I can tell you that it is neither! I want to show you how to build a home bar on a budget, and you can do the same by following this step på step guide. 
Let’s jump in!
 
$ 0
Total price
Estimated time
30 Working hours
Difficulty
3.5/5

Before we started

So this was how it looked before we did anything. We had bought a wine-fridge and use put a left-over table top on top of it, and on the side we had put an high furniture from Ikea we also had as leftover. 
Home-bar-build-before

Step 1: Install Ikea kitchen drawer and wine-fridge

We bought a piece of Ikea kitchen furniture, the white one seen on the picture below. WE bought it with 3 drawers to store bottles in the bottom drawer, and cocktail-tools in the top drawers. 
We used some leftover wooden planks to build a little foundation for the wine fridge and kitchen drawer to stand on. 
We also decided to paint the wall behind the bar to make the area look like it own little part of the room. We used som leftover paint we had form when we did the bedroom (read article about the bedroom here) 
raw-build-process-home-bar

Step 2: Hang up the shelves

After the paint job and the wine-fridge and kitchen drawer was installed, then it was time to create some wooden shelves, to storer bottles and glasses. We were super lucky to find an old piece of dark wood in a container outside our apartment, and using a circular saw we cut 3 shelves in the right dimensions. 
Using a triangle pieces of wood we crated a “frame” screwed into the wall, for us to put the shelves on. This was more of a decisions based on how we wanted it to look rather than finding the easiest way, since there was defiantly other easier ways to hang up the shelves. 
home-bar-shelves-build

Step 3: Mosaic time!

First we had planned to find a black marble table top to use in the bar. Put since we didn’t have the tools to cut one in the right dimensions, the price for a pre-cut marble paste was sooooo high! Therefor we decided on using mosaic! We found the most amazing system in Bauhaus, where you basically buy plates of mosaic, with super stick tape underneath! All we had to du was stick the mosaic plates in the table top, and make a few adjustments in the corners! 
Without the product form Bauhaus this would have taken us forever, but we managed to cover the whole bar within a few hours!
home-bar-mosaiq-done

Step 4: Final attachments and paint

After the mosaic project we painted the shelves-holders, and installed everything! Now we just need to add filler in-between the mosaic!
home-bar-almost-done

Step 5: Add filler between mosaic

Adding some dark-grey filler between the mosaic-tiles made the surface waterproof (quite important on a bar) 
Mosaic-filler

Final result

How to build a home bar on a budget​
home-bar-done-1
SAVE MONEY ON YOUR DIY PROJECT

5 Tips to save money on your DIY project

5 Tips to save Money on your DIY Project

DIY is the best way to save money on a home project! But you can do even more than that! Following along for the 5 best tips on how to save money on your next DIY Project! 

1. Buy second hand stuff

You can find a lot of stuff second hand, which can save you a TON OF MONEY! Spend some time researching different second hand websites or go to second hand shops, or flea markets.

2. Always save leftover materials

If you have pieces of wood or other material left over from a project, make sure so save it. They might come in handy at your next project, which can save you a lot of money.

3. Always save leftover screws /tools

Furniture often comes with a bunch of different screws and weird tools, Make sure to save all of this, since you might be able to use it at a different project. I would suggest buying a organizer-box to easily keep track of all of these leftover screws etc (check out the article 11 Most essential Handyman Tools for more inspiration) 

4. Be creative and think outside the box

Try and think outside the box in your planing and design phase. Instead of buying a very expensive piece of furniture, maybe buy an Ikea version and give it some paint / love. Our bedroom cupboards where bought cheaply from Jysk, and our drawers in or walk in closet are from Ikea, we just added some cool paint. 

5. Spend good time on research

Spend time researching different options.
Ex, a costume made New York Glass Wall is very expensive, but what about a shower door that has the same look (read how we did exactly that in this article), or maybe even try and build your own with wooden planks and plexiglass?
Dog-house-build-done

Dog House Build in 6 easy steps

Dog House Build in 6 Easy Steps

The overall idea with the dog house

Using the space+copying the existing style in the room! 
From the couch-area up to the dinning room we have stairs, and under the stairs we had just dead space. Since we had decide to get a dog, we came up with the idea of build a bog house in this area. Since we spent a lot of time creating a NY Loft Style vibe in the room, we wanted to go for the same look for the doghouse. This is how we did it:
beforer-after-dog-house
$ 0
Total price
Estimated time
15 Working hours
Difficulty
1.5/5

Step 1: Build the front window

Since we love the NY Glass walls, and already had them in the room, we wanted to create something similar. 
First we crated a wooden frame to fit the window inside. 

Step 2: Paint and cut the window

Then we painted all the wood black, and cut out a piece of plexiglass to fit in the frame. The plexiglass we found in a store (find link here), just a 3mm version, and we used the multi-cutter tool to cut it in the right size. Again the multi-cutter tool is THE BEST! (See the 11 Most Essential Handyman Tools here)
Frame-painted-dog-house-build

Step 3: Time to create a “brick wall” with a window inside

This was a fun task! Not something you get to do every day. Trying to build a “brick wall” with a NY Style Glass window inside, for a dog 😀 
First we cut out a plate that would be the wall. Inside the wall we cut a hole for the window. 
Brick-wall-for-dog-house
Then we applied some brick-wall wallpaper, and finally we added plexiglass and a black-painted wooden frame. 
Brick-wall-wallpaper-dog-house-build

Step 4: Add a door-frame

Around the door we build a door-frame and painted it black. We used blackboard paint since it has a nice mat finish. 
Door-frame-dog-house-build

Step 5: Add a light for the dog

Nicolai came up with the crazy idea of making a light for the dog, the could be turned on/off from inside the doghouse, with a big switch. 
For the dogs safety all the wires needed to be well hidden so a curious puppy would be able to acces the wires. 
Light-dog-house-build

Step 6: Make a cozy and wholaa!

Some final adjustments inside the house, a cozy dog-bed and some blankets, and there we go! 
Dog-house-build-done
DIY Hallway makeover

DIY Hallway makeover

DIY Hallway Makeover

Do you want to see how we did a Complete DIY hallway makeover, for less than 300$?
Then following along!
Before-after-DIY-hallway-makeover
$ 0
Total price
Estimated time
40 Working hours
Difficulty
1/5

This was what the hallway looked like before we did anything

The previous owners had left a big closet in the middle of the hallway, to have storage space and also to cover up the electricity controlling board. But the closet made the room so much smaller than it actually is, so we decide to do a complete DIY Hallway makeover. 
Before-hallway

Step 1: Choose color

We wanted to paint the whole hallway, and as usual finding the right color is not that easy! It took 4 tests colors before we finally found the right color, a green/grey olive color. We found the color in our favorite store,  Bauhaus!
Color-sample-hallway

Step 2: Remove old furniture

The second step was to remove the closet in the middle of the hallway. After a bit of wrestling around with the closet, we managed to get it free! Already then the room felt so much bigger! We gave damaged areas on the wall a bit of filler and some basic white paint. In a process like this, its important to have a good selection of tools! If you dont know where to start in your tool collection, here is a list: 11 Most Essential Handyman Tools
Remove-hallway

Step 3: Paint

After clearing the room we started painting! 2 layers of paint did the job! We absolutely loved the color we had chosen, and the room completely changed character! 
Paint-hallway

Step 4: Build furniture

After having removed the old big closet, we need something else for storage. After many hours of research we found 2 pieces of furniture form Ikea, and bought them second-hand for very cheap price. A drawer for shoes / keys and everyday stuff you need by the hand leaving the house, and a combined bench/drawer. The bench function we wanted to use for taking shoes on/off, and the big drawer we wanted because our work-bags always ends up in weird places when we come home from work. Now they would have a dedicated space. 
We also wanted to cover up the electricity control board, so we build a frame around it with some leftover wood we had laying around. 
Install-furniture-hallway

Step 5: Adjust furniture to hallway!

Both the bench/drawer and the higher drawer needed some adjustments to fit better in the hallway. Some small cuts in the furniture and the list around the floor did the job! 
Cut-edges-hallway

Step 6: Front of drawer

Annie came up with an amazing idea for the front of the big drawer under the bench. She bought 400 wooden ice-sticks, and started creating a herringbone pattern in the middle of the front of the drawer. She also added the green color we used in on the hallway walls, and OMG, the result turned out amazing! It did take quite some time, but the final result was all worth it!
Front-drawer-hallway
It did take quite some time, but the final result was all worth it!

Final result!

We painted the rest of the bench in the same green color, and created a little place to hag our jacket, and put hats/small bags. 
And here is the final result! 
Final-result-hallway-makeover-2
Final-result-DIY-hallway-makeover
Final-result-DIY-hallway-makeover-1-makeover-3
Final-result-DIY-hallway-makeover-4
Save Time on your DIY Project

5 Tips To Save Time On Your DIY Project

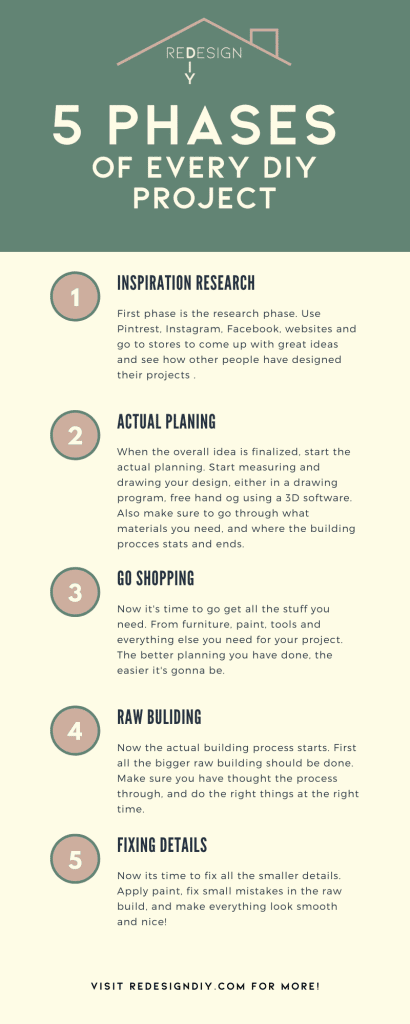
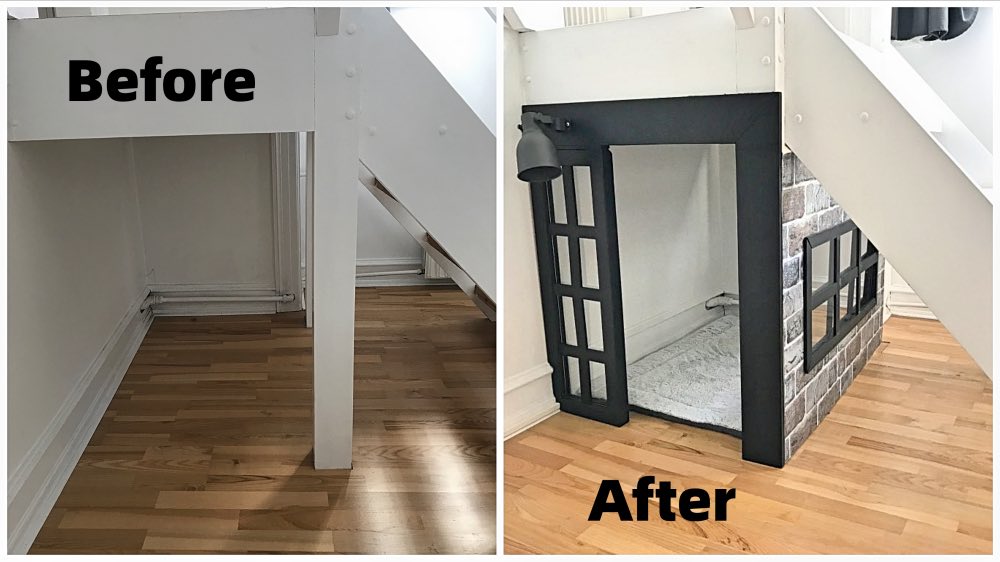
5 TIPS TO SAVE TIME ON YOUR DIY PROJECT

Save Time on your DIY Project

Are you ready to save time on your DIY Project?

Then you have come to the right place!

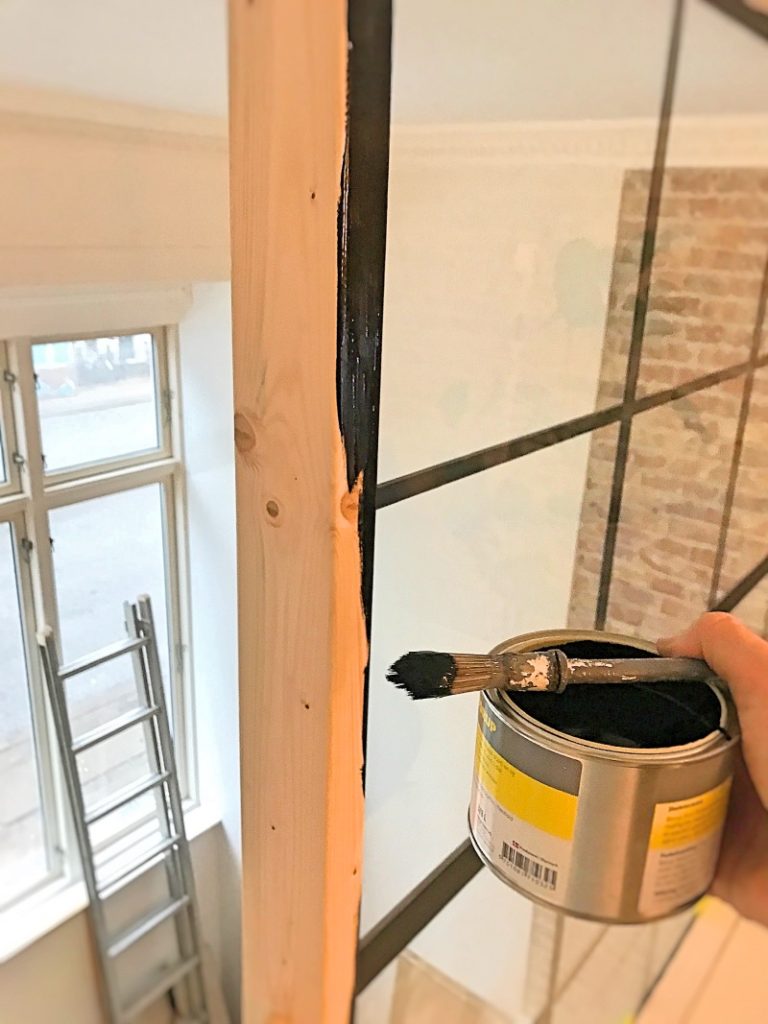
1) Have an overall plan of the different building phases

Make sure you have given to whole building process a lot of thoughts. Plan in which order you will do the different things. Should you paint first, and while the paint dries you can prep the next phase, or what is the smartest order to do things in.

2) “Batch up” elements

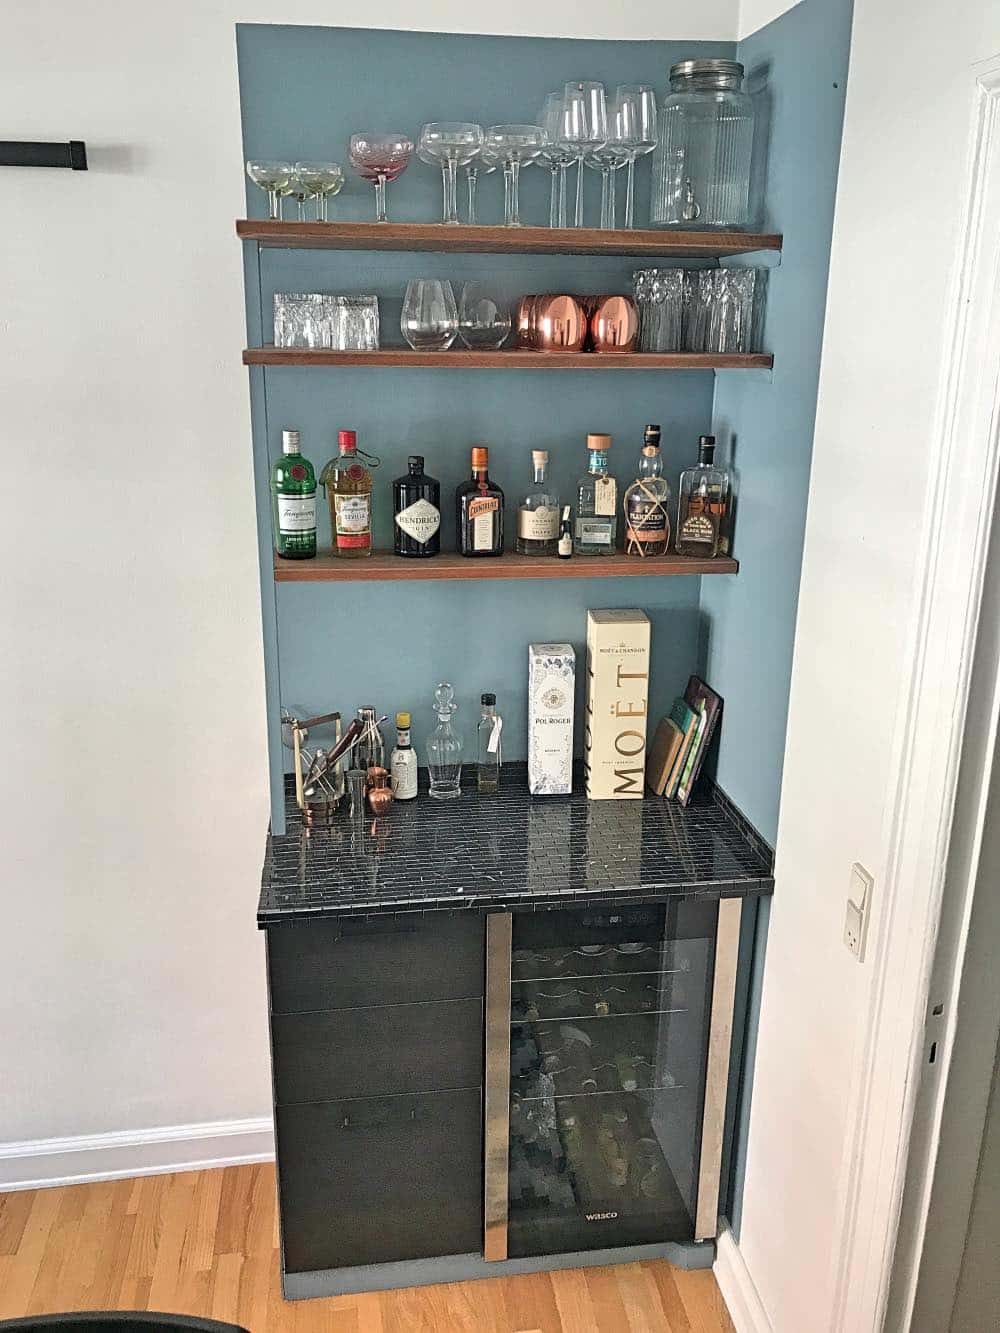
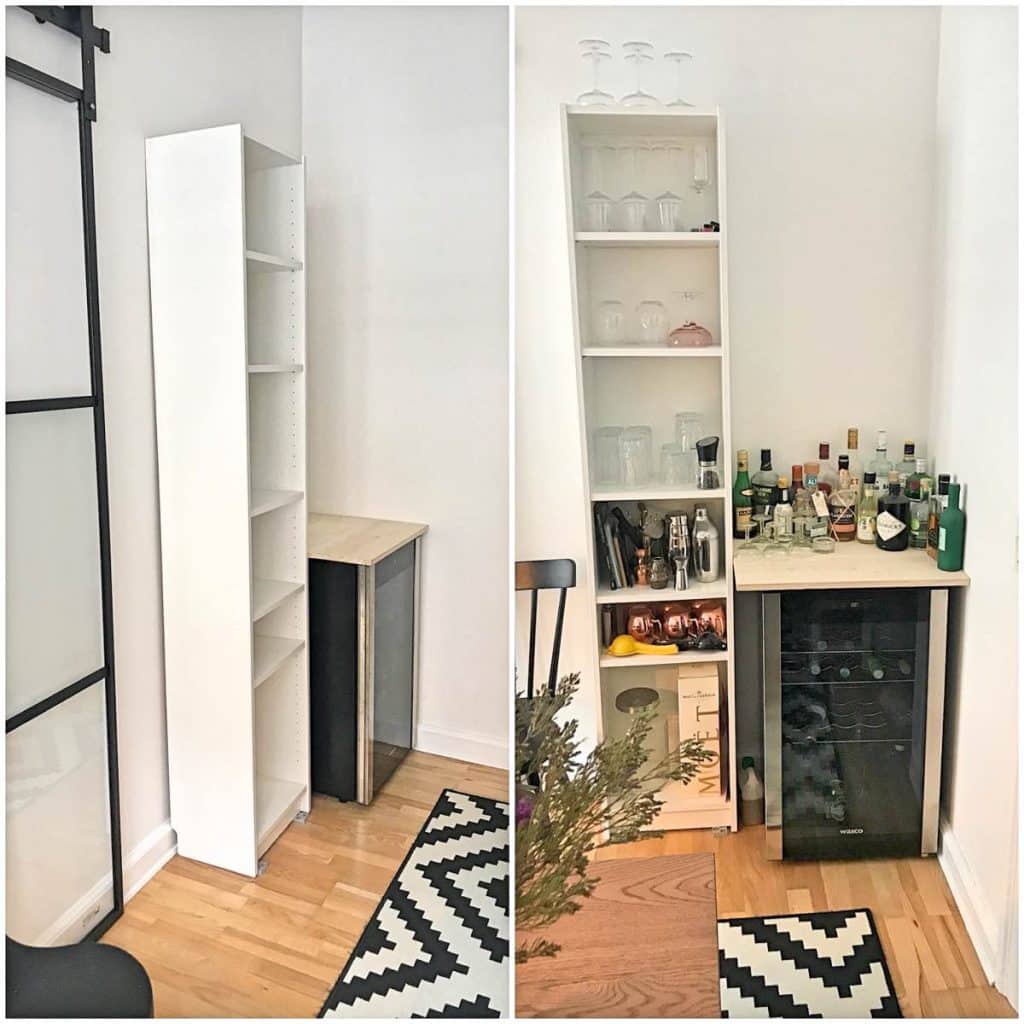
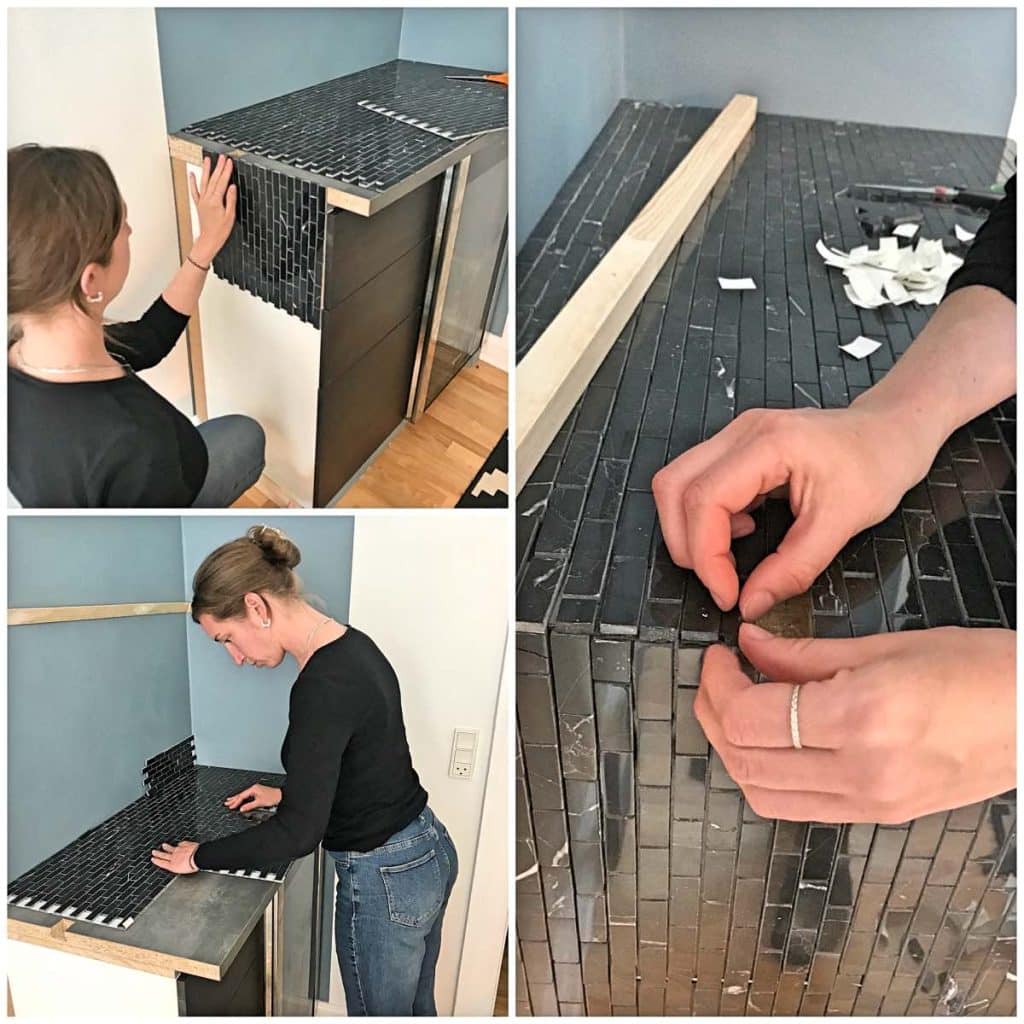
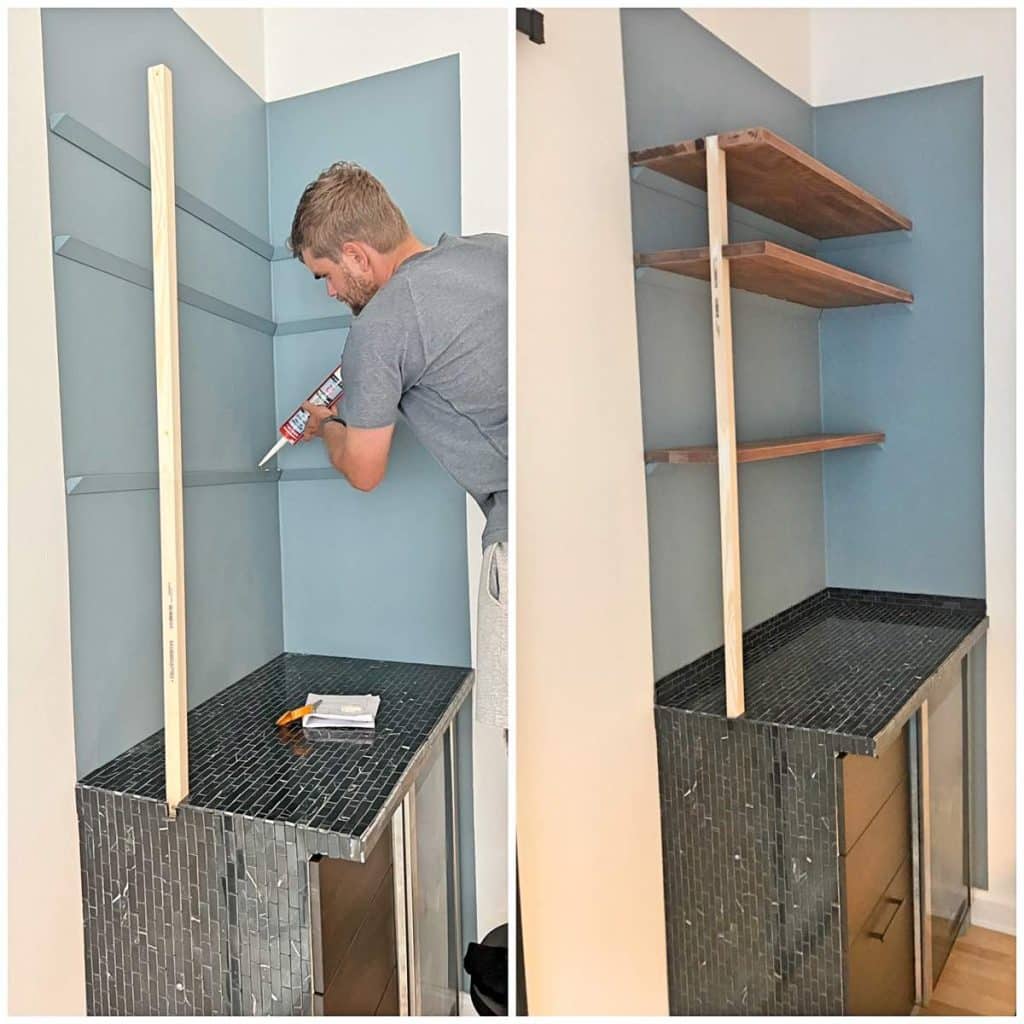
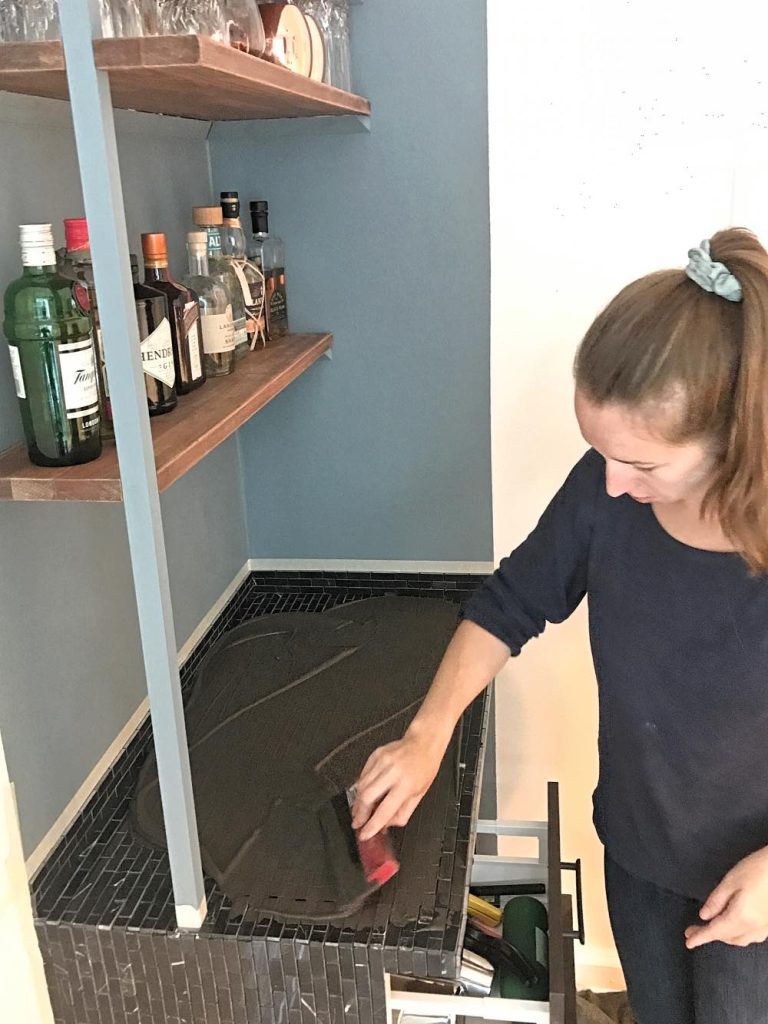
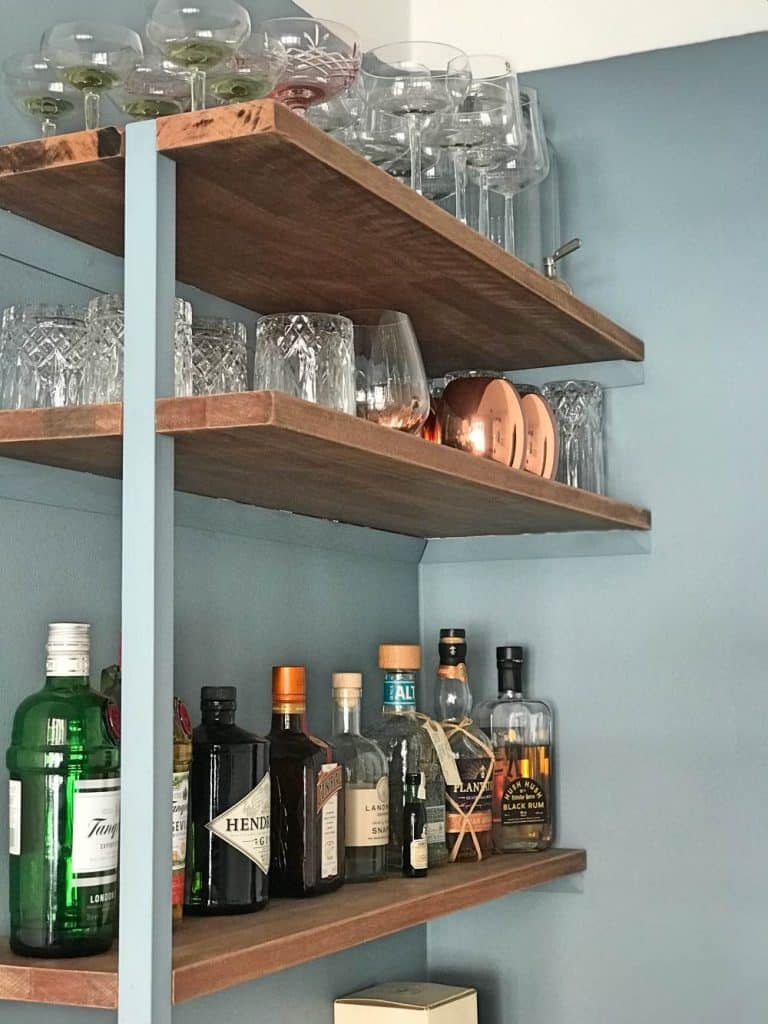
Let’s say you are putting up 6 cupboards, and need to put them together before hanging them up. It’s better to put all 6 cupboards together at once, and then hang all of them up afterwards, since you will get to know the process and have all the tools ready at once, instead of going back and forth between different processes and tools (See how we did that in this article).

3) Shop everything you need at once

Make a shopping list so you can buy everything you need at once! Your overall project plan needs to be detailed enough, so you know all the things you will need during the building phase.

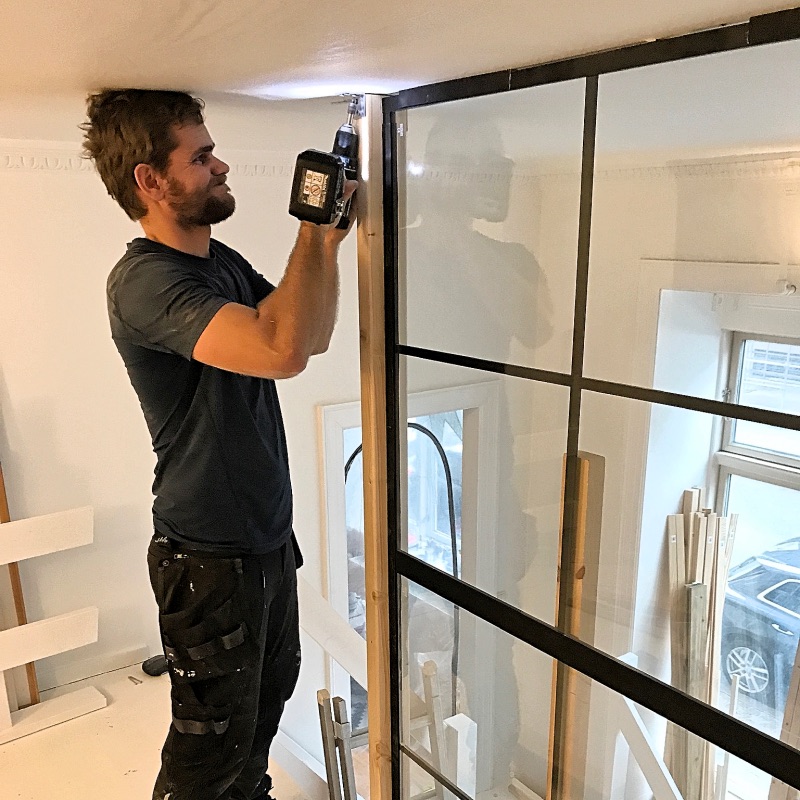
4) Ask a friend to make difficult things easy

Some tasks are almost impossible to do alone. Instead of trying to find a solution to do it on your own, ask a friend or family to help, and have everything prepped. A simple 20 minuts of help from another person could save you many hours.

5) Dont work when you are tired

When you are tired you are more likely to make mistakes and loose the overall view of the project. It’s better to stop 30 minuts earlier than keep going and make one mistake that will cost you several hours.
New York Loft Syle Home Office

New York Loft Style Home Office

New York Loft Style Home Office

A New York Loft Style Home Office, in the middle of Copenhagen? Not the most typical thing to find, but we are getting closer and closer. If you want to see how we have done it so far, and get inspired yourself, follow along! 
$ 0
Total price
Estimated time
80 Working hours
Difficulty
4/5

The area before

So this is how the loft area looked when we moved into the apartment. The room it is located in is more than 4 meters from the floor to the top ceiling, and to utilize the room the best, the previous owners had build this loft area. We wanted to spice it up, and since we both love the New York Loft Style vibe, we decide to try and create that feeling in our home office. 
The loft area is around 2,2 m from wall to handrail, and 3,4 meters on the long side. The floor was a wooden floor, which cold be cool but the type and color of the wood was not what we where looking for at all. 

Step 1: Sandpaper the floor and add paint

Using a circular grinder, we grinede down the top layer of the floor, and afterwards we gave it 3 layers with white floor-paint. 

Step 2 - Build office table

Afterwards we wanted to create a cool office desk-table. We had an older plank of wood stored, that we in a previous home had use as table, and we decided to use it for the office table, since we loved the color and type of wood. 
To spice up the design, we came up with the idea of letting the table run all the way to the floor, so the table top is actually used as a leg for the table. So we cut the wood with a circular saw with a cut angle of 45 degrees, and then we mounted it together with small iron angles underneath the table. 
We attached the table on the wall by putting square of wood on the wall, that the table then is resting on, and screwed into it from underneath. 

Step 3: From chaos to less chaos!

Afterwards we really liked the table and idea of the office design, but it was a mess with a bunch of thing laying around. Wa later on solved this issues by getting a small drawer for all our small office things such as paper, writing tools, wires etc. 

Step 4: Add New York Loft Style to the home office

To give the the room a  New York Loft Style Home Office vibe, we decide to remove the outer layer of the wall, to expose the brick underneath. 
A hammer-drill with a flat head was amazing for this job (way better than the manuel way as seen on the picture)
Well now we were getting closer to get the right vibe! 

Step 5: Build a New York glass wall

But we never really liked the handrail, and had a crazy idea. Industrial glass walls! (You can ready a full article about the DIY Industrial Glass Wall right here) 
So we took down the handrail, and started the build of the glass wall! 

Step 6: Add some nice furniture and there we go!

And that was the final part of the build! 
We went shopping and found a wonderful chair, a carpet, and a lovely drawer that we put under the table, and we felt like we managed to get the New York Loft Style Home Office that we had dream of. 
DIY-Industrial-Glass-Wall

DIY Industrial Glass Wall

DIY Industrial Glass Wall

Have you ever wanted to created a DIY Industrial Glass Wall, but never knew how, and always thought it is way too expensive! What if I told you that we have found a way that EVERYONE can use, and that is crazy CHEAP! Read on, this will blow your mind…
Before-after-DIY-Industrial-Glass-Wall-text
$ 0
Total price
Estimated time
25 Working hours
Difficulty
3/5

Step 1: Order glass shower walls

We searched the internet for the cheapest solutions to buy New York glass walls, but they where all way above 1000$ each. 
One day we suddenly found Shower Glass Walls, and they where so much cheaper. We found these, for only 212$ each: New York Glass Shower Wall
We ordered 2 of those walls. 
Glass Shower Doors

Step 2: Clear area

Now it was time to start clearing the area where the walls would stand. We took down the handrail, by using an old school handsaw. While building the DIY Industrial Glass Wall we where also fixing a brick wall, you can read about that project in the article DIY Brick Wall.

Step 3: Prepare to install

After removing all unnecessary stuff, it was time to start preparing for installation. Since the loft area where the walls where gonna stand is only 178 cm high, and our glass walls where 220 cm high and 90 cm wide, we had an issue. We where planning to actually have the doors laying on top of each other, which would give us dimensions of the whole wall being 220cm wide and 180cm high. But since the ceiling height is 178cm, we had to cut away 2 cm of the floor to fit the DIY Industrial Glass Wall. 
Cutting-floor
I used my Multi Cutter tool for this job, cutting from both sides of the edge of the floor. Check out the 11 Most Essential Handyman Tools  to read more about the Multi Cutter Tool, it is AMAZING!

Step 4: Prepare to install part 2

We also needed to do some preparation in the celling, since we had a nice rounded corner with pattern. Again using the multi cutter tool it was not a big hurdle. 
Cutting-celling-glass-wall

Step 5: Test if the walls fit the space

After finishing all the cutting and clearing out process, we tested if the wall actually fitted correctly, and it did! We put up 2 temporary poles on the outside of the wall to see how everything worked out.  
Glass-wall-test-2

Step 6: Building a frame to hold the walls

Since we where planning to put the 2 glass shower doors on top of each other, we needed a frame to support them. Luckily with the shower doors we had bought, attachment rails were included. We cut the rails into several pieces, and drilled some holes through them, to be able to attach them in the celling and on the brick wall. 
It required maximum precision in the measuring process, and a ruler and a digital level was a MUST have. 
Glass-wall-frame

Step 7: Installing the walls

Moment of truth! We stacked the 2 shower doors on top of each other, and sealed the frame around them by connecting a solid pole between the celling and the floor. 
Installing-glass-wall

Step 8: Details

Time to do the final details. We had some leftover wooden sticks that we used to create a simple hand rail, and afterwards we used some filler and sandpaper to fix small cracks and marks in the build. 
Industrial-glass-wall-almost

Step 9: Paint

Time to paint the wood, and we actually used Black Board Paint, since it has an amazing cool mat black color. 
Black-board-paint

Final result

This is how it turned out! 
DIY-Industrial-Glass-Wall
DIY-Industrial-Glass-Wall-2
DIY-Industrial-Glass-Wall-1
DIY-Industrial-Glass-Wall-4
Planning your DIY Project

Planning your DIY Project

Planning your DIY Project

Planning your DIY Project before starting building can both save you time and money, and in the end give you a much better result! Here is how the planning phase could be done! 

1) Inspiration research

Use Pintrest, Instagram, Facebook, websites and go to stores to come up with great ideas and see how other people have designed their projects.
Are you happy with your design? 
Yes: Move to next step
No: Restart step 1

2) Measure and draw

Start measuring and drawing your design, either in a drawing program, free hand og using a 3D software. Also make sure to go through what mateirals you need.
Does your idea fit how you want it? 
Yes: Move to next step
No: Restart step 1

3) Calculate price

With the drawings created you should know what kind of furniture / materials you need. Try and calculate the price.
Are you okay with the price? 
Yes: Move to next step
No: Restart step 1

4) Go through the building procces

Figure out in which order the different things should be build. This should be very detailed and should be down to every single screw, since it can make it or break it if you get it wrong.
Is your project possible to build?? 
Yes: Move to next step
No: Restart step 1

5) Start building!

Planning your DIY project
How much to build a walk in closet-notext

How much to build a walk in closet

How much to build a walk in closet

Have you every wanted to build a walk in closet, but dont know the cost of it? 
Its your lucky day, because here is a breakdown of all of our expenses from the walk in closet we built. You can see the full build by reading the article: Building a walk in closet in basement – step by step
Building a walk in closet in basement

The Budget

We already had all important tools for both preparation, building and painting
Prices are given in both Danish (dkk) and US dollars ($)
Paint
Floor paint: 2 x 2,5 liters for 160,- each = 320 ,- (49$)
Wall and ceiling paint:  5 liters for 500,- (76$)
Paint for closet: 800,- (122$)
Base layer for closet: 300,- (46$)
1920,- (293$)
Furniture
4 x Ivar Drawers for 600,- each = 2400,- (366$)
6 x wooden shelves from Bauhaus (Paulownia Limtræ Bauhaus) 2200 x 500 x 18mm for 240,- each = 1440,- (220$)
3840,- (586$)
Building material 
Round log for hangers – 4 meters = 300,- (46$)
3 pieces of 12 mm MDF-plate 2440 x 1220 mm  for 270,- each = 810,- (124$)
15 meters of Woods Squar Dowel Rod  – 15,- kr pr meter = 225,- (35$)
1335,- (205$)
IKEA light system – Skydrag LED light
5 x 40 cm long for 80,- each = 200,- (30$)
5 x 80 cm long for 150,- each = 750,- (115$)
2 x Wireless driver for 119,- each = 238,- (36$)
1 x wireless switch = 99,- (15$)
Package with 2 led spots = 99,- (15$)
Plastic trays to hide wires from light system = 99,- (15$)
1485,- (226$)
Extras
Screws, wall plugs and iron angles: 300,- (46$)
Multi filler: 60,- (7$)
360,- (53$)


Total Price: 8940,-  (1363$)
12