Extra shelf space in the kitchen is always a game-changer, and building your own DIY floating kitchen shelves is a quick and affordable way to add both function and style to your space. In this simple step-by-step guide, I'll walk you through how to create your very own floating shelves with minimal tools and materials. Let’s get started on making these elegant and practical kitchen additions!
Total Price
0$
Estimated time
1 working hour
Difficulty
1/5
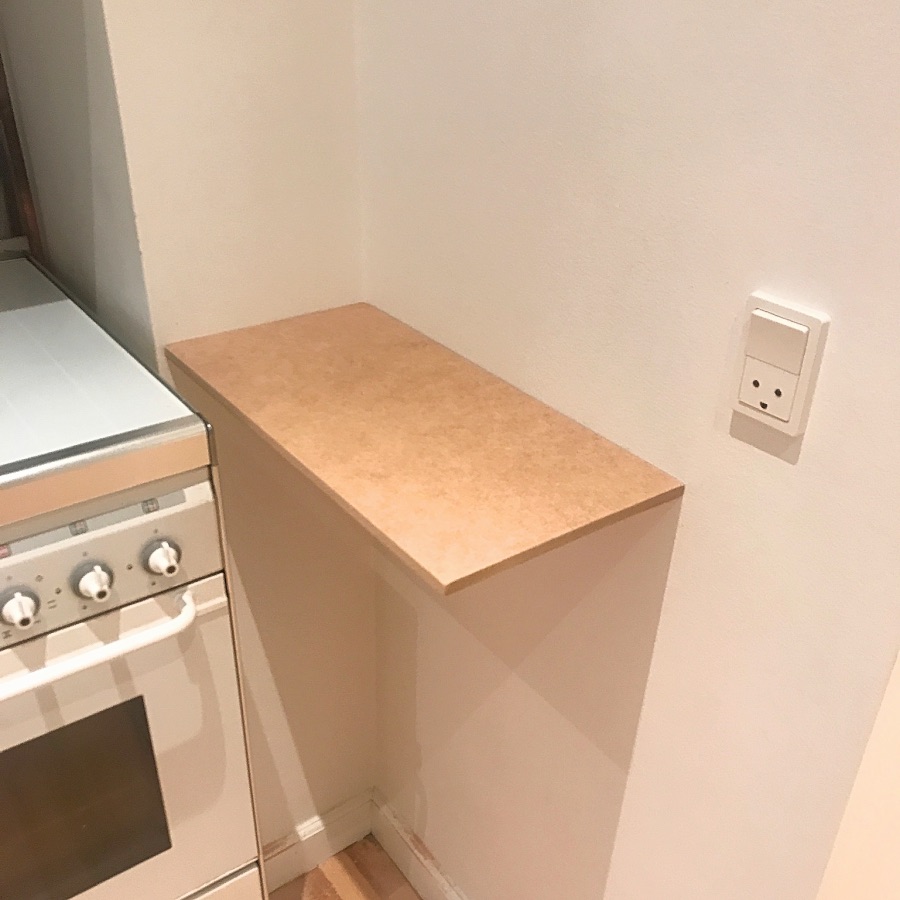
Step 1: Cut of the shelf
The first step in making your DIY floating kitchen shelves is cutting the shelf itself. We used a leftover piece of MDF plate for this project. MDF is ideal because it’s sturdy, smooth, and easy to work with. Begin by measuring the dimensions of the area where you want the shelf to hang. Once you have the measurements, mark them on the MDF plate.
Using a simple hand saw, we cut the MDF to the appropriate size to fit perfectly into the corner of our kitchen. If you prefer a more precise edge, you can also use a circular saw, but a hand saw works just fine for this project. The beauty of DIY floating kitchen shelves is that you can customize the size to fit your exact needs!
Materials: MDF Plate Tools: Hand Saw (or Circular Saw)
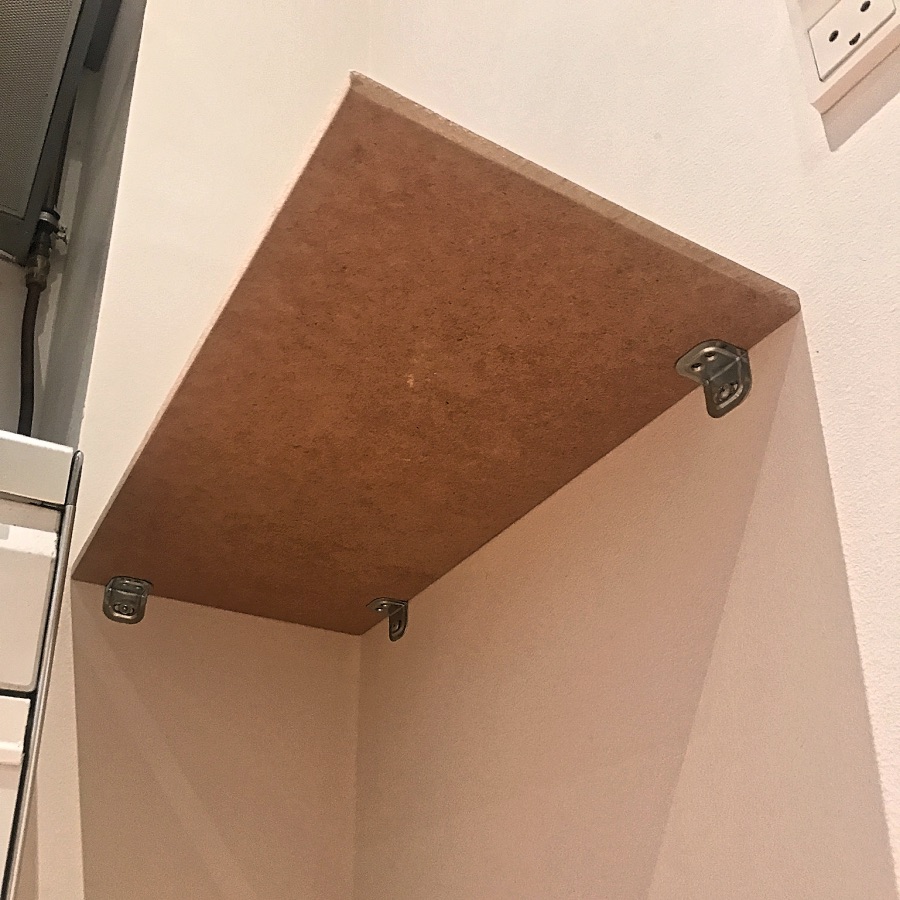
Step 2: Attach angle irons
To create the “floating” effect for your DIY floating kitchen shelves, you’ll need to use angle irons. We chose small angle irons to keep them as hidden as possible. The more concealed the supports are, the more convincing the floating illusion will be!
First, attach three small angle irons to the wall in the spots where you plan to place the shelf. Make sure to use a level to get them perfectly straight. We secured the angle irons with wall plugs and screws, ensuring they would hold the weight of the shelf and any items placed on it. The smaller the angle irons, the more they’ll disappear behind the shelf, enhancing the sleek, floating appearance.
Materials: Small Angle Irons, Wall Plugs, Screws Tools: Screwdriver, Level
Step 3: Rounding of corner
For safety and aesthetics, we decided to round off the outer corner of the shelf. This is especially useful for DIY floating kitchen shelves that will be installed at eye level or in high-traffic areas. If someone bumps into the shelf, a rounded edge is much friendlier than a sharp corner!
Using a multi-cutter tool, we carefully cut away the corner to create a smooth, rounded edge. Then, we used sandpaper to smooth out the surface for a clean finish. If you don’t have a multi-cutter, a hand saw or jigsaw can do the trick—just remember to sand it down afterward for a nice, polished look.
Materials: Sandpaper Tools: Multi-Cutter (or Hand Saw/Jigsaw)
Step 4: Paint the Shelf and Angle Irons
Painting is a crucial step in achieving that “floating” effect for your DIY floating kitchen shelves. We chose a sleek gray paint for the shelf itself to match our kitchen decor. Before attaching the shelf to the wall, we also painted the angle irons white. This way, they blend seamlessly into the white wall, making them almost invisible and emphasizing the floating effect.
Choose a paint color that complements your kitchen. Whether you prefer a bold color for a pop of style or a neutral tone to blend in, make sure to apply a couple of coats for a smooth, even finish. Allow the paint to dry completely before proceeding to the next step.
Materials: Paint (Shelf and Angle Irons) Tools: Paintbrush
Step 5: Attach the Shelf to the Angle Irons
Finally, it’s time to attach the shelf to the wall. Carefully place the shelf on the angle irons and secure it with small 13mm screws. These screws are short enough to prevent them from poking through the top surface of the shelf, keeping it clean and smooth.
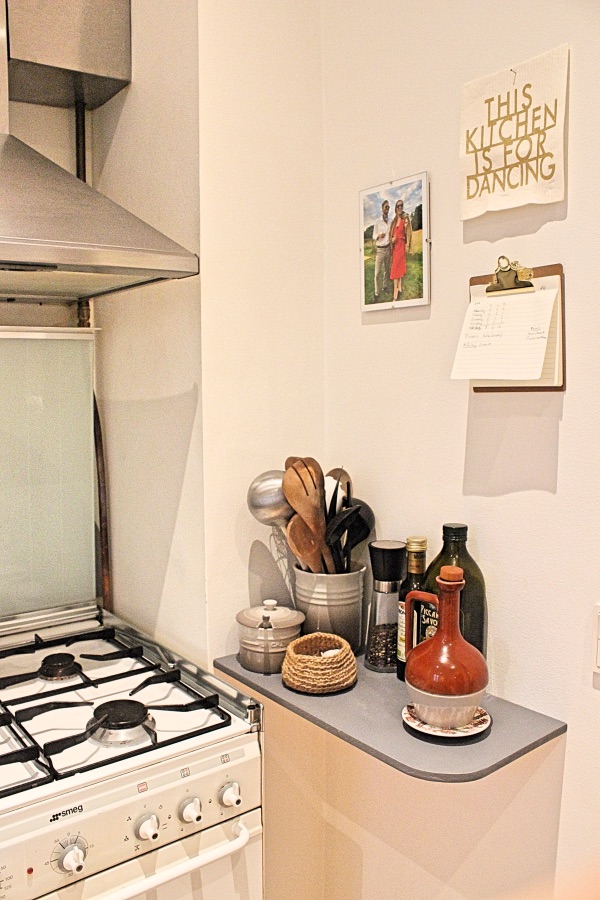
Once everything is screwed in, step back and admire your work! These DIY floating kitchen shelves come together quickly and add a stylish, practical storage solution to any kitchen.
Materials: 13mm Screws Tools: Screwdriver
With just a few materials and a little bit of time, you’ve created your very own DIY floating kitchen shelves! This project is a fast, cost-effective way to add extra storage and a modern touch to your kitchen. The floating design keeps the look light and airy, perfect for smaller kitchens where space is precious.
These shelves are not only functional for storing spices, dishes, or decor but are also customizable. You can experiment with different shelf sizes, colors, and finishes to match your kitchen’s style perfectly. So, why not give it a try? Your kitchen will thank you for the extra storage and the sleek, stylish upgrade.
Final Thoughts on DIY Floating Kitchen Shelves
Building DIY floating kitchen shelves is an easy, rewarding project that transforms your kitchen space. By customizing the size, shape, and color, you can create a storage solution that fits your unique style and needs. Plus, the floating design adds a touch of modern elegance without overwhelming the room.
Give this DIY project a go, and you’ll soon have beautiful, functional shelves that not only save space but also add character to your kitchen. Happy building!